DIY Orb Light Fixture (Part One)

Hi! Since my last post we got the absolute cutest puppy on earth, Charlie, and it hanging out with him really ate into my project time! Here he is on the day we got him. He is growing so fast!

Charlie! JustSomethingIWhippedUp

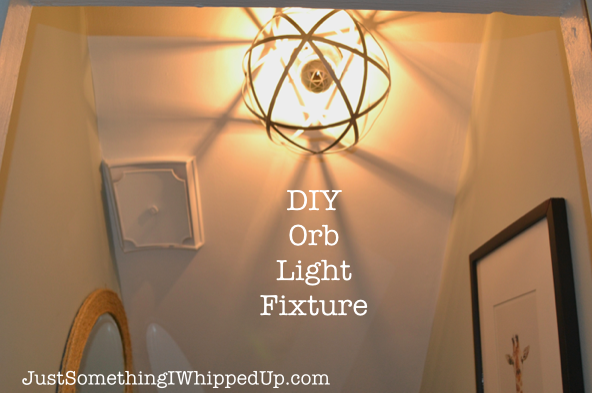
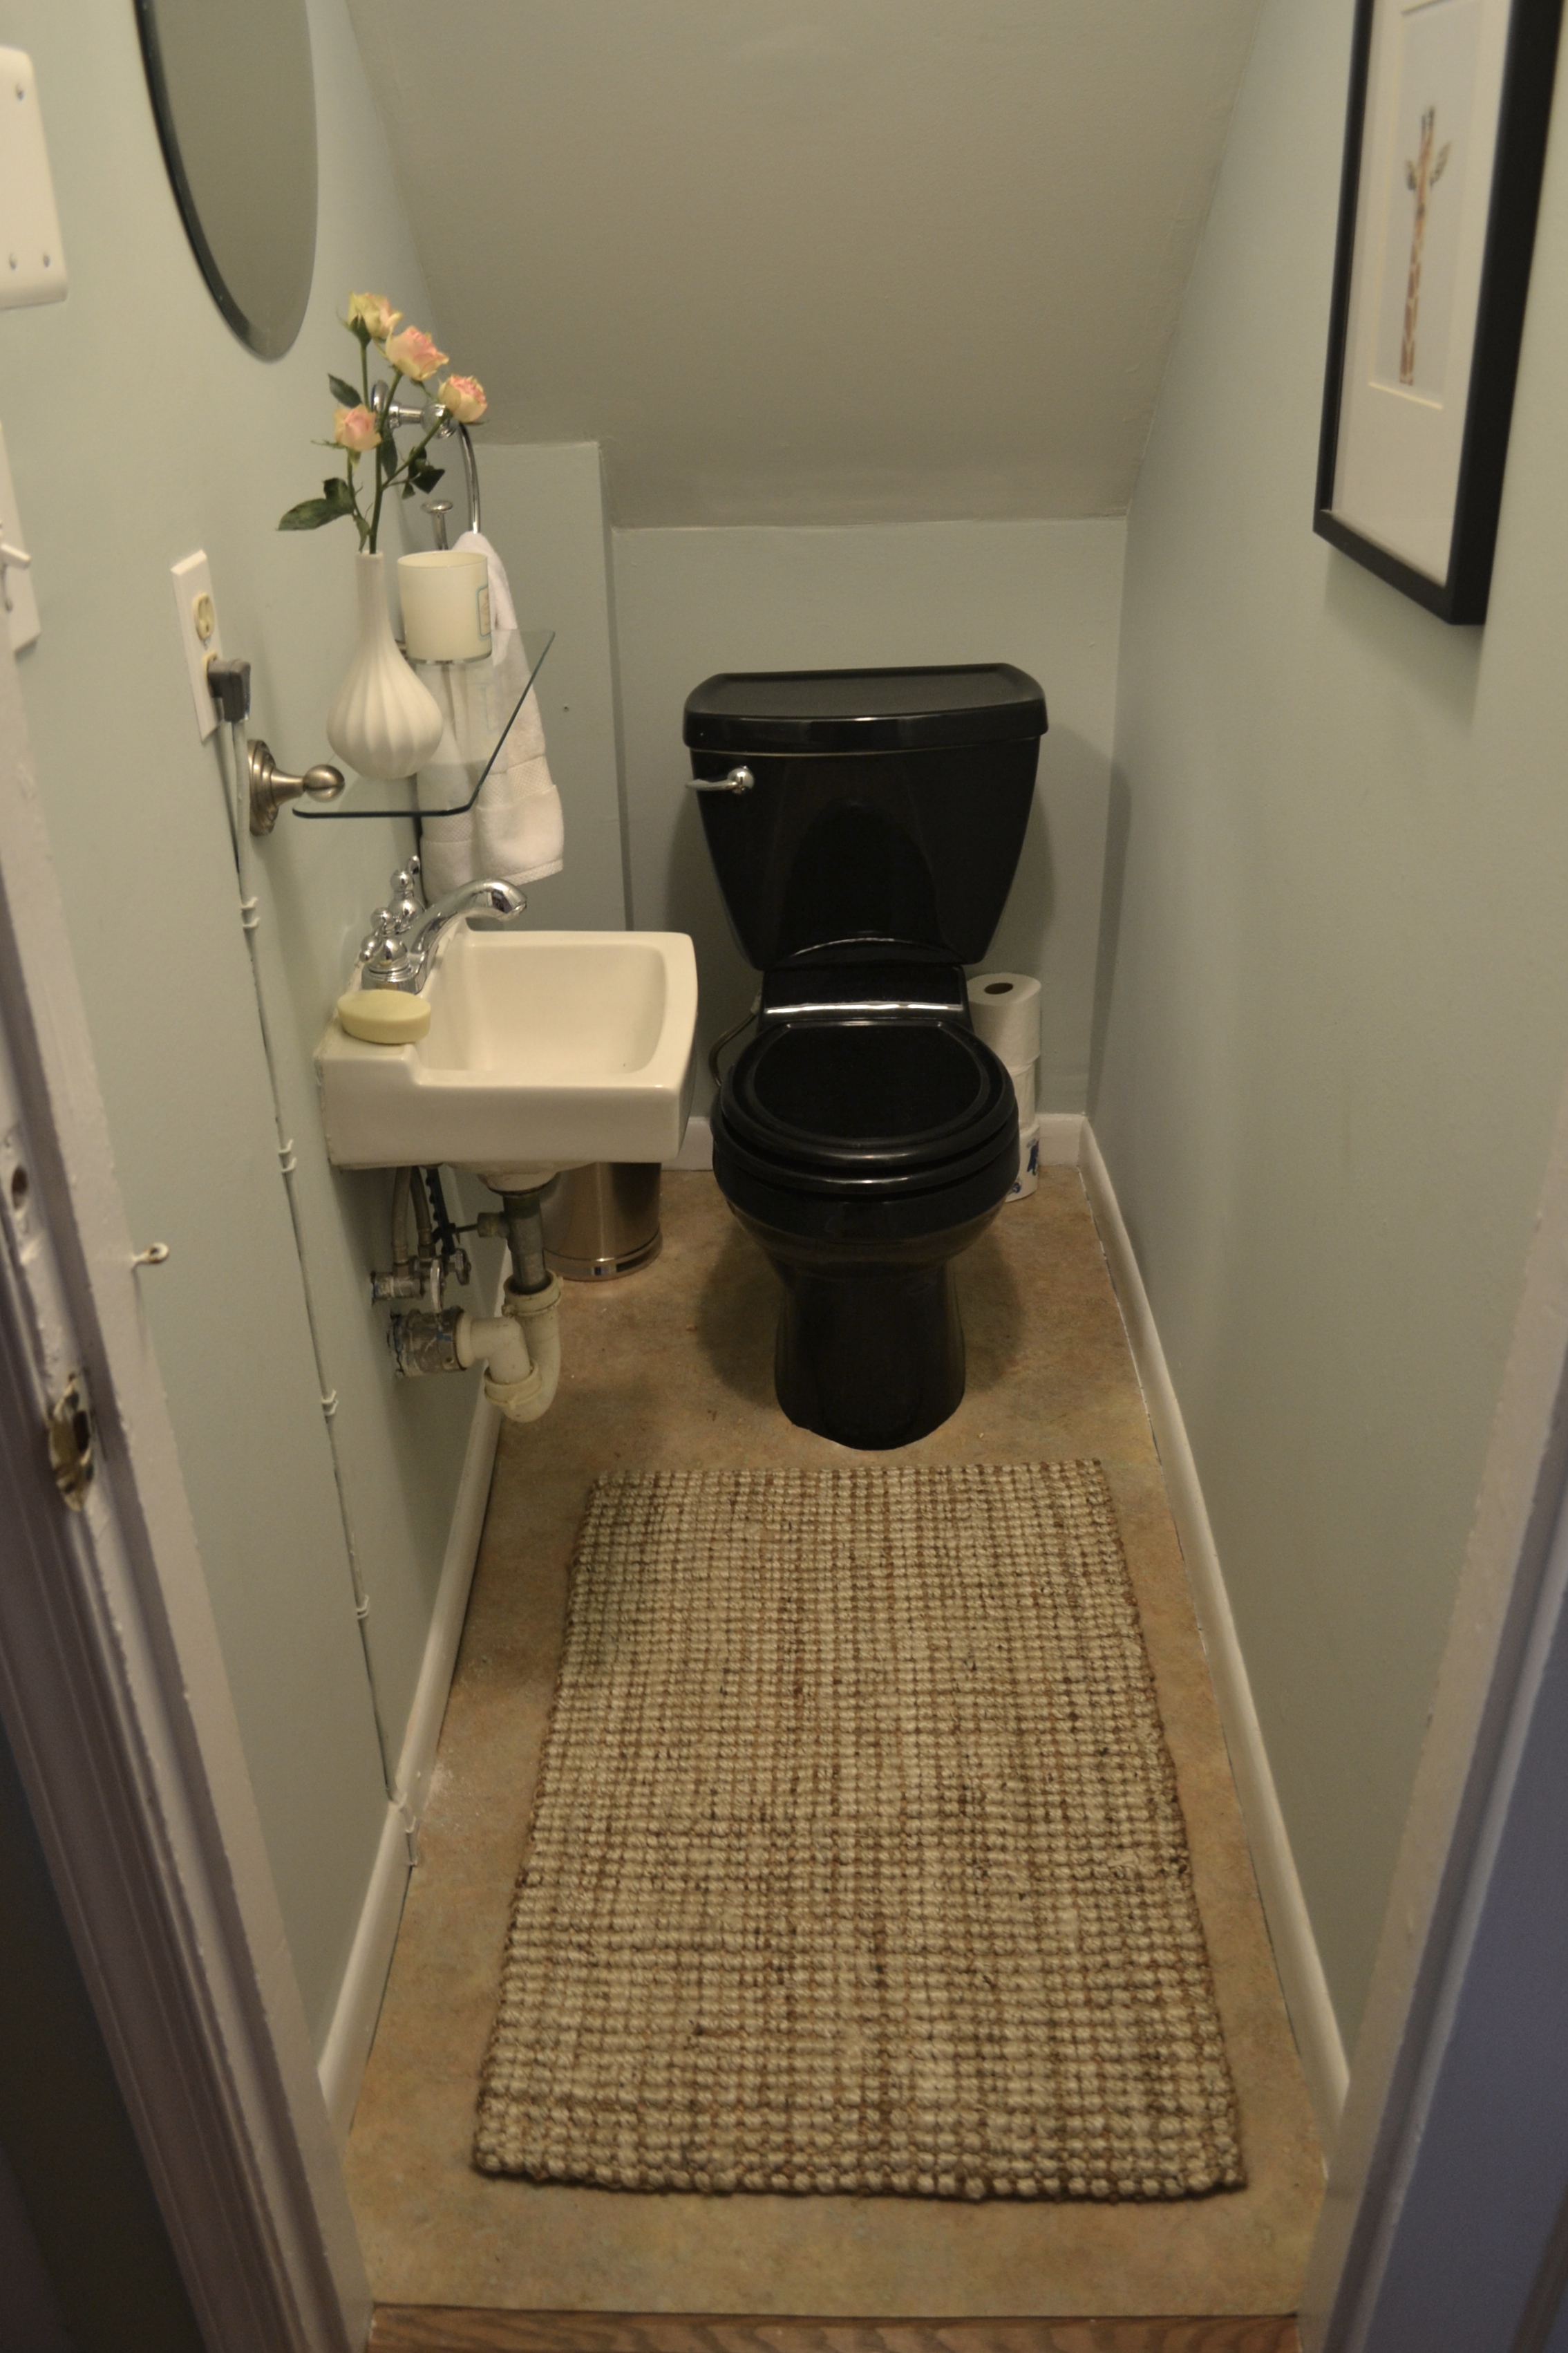
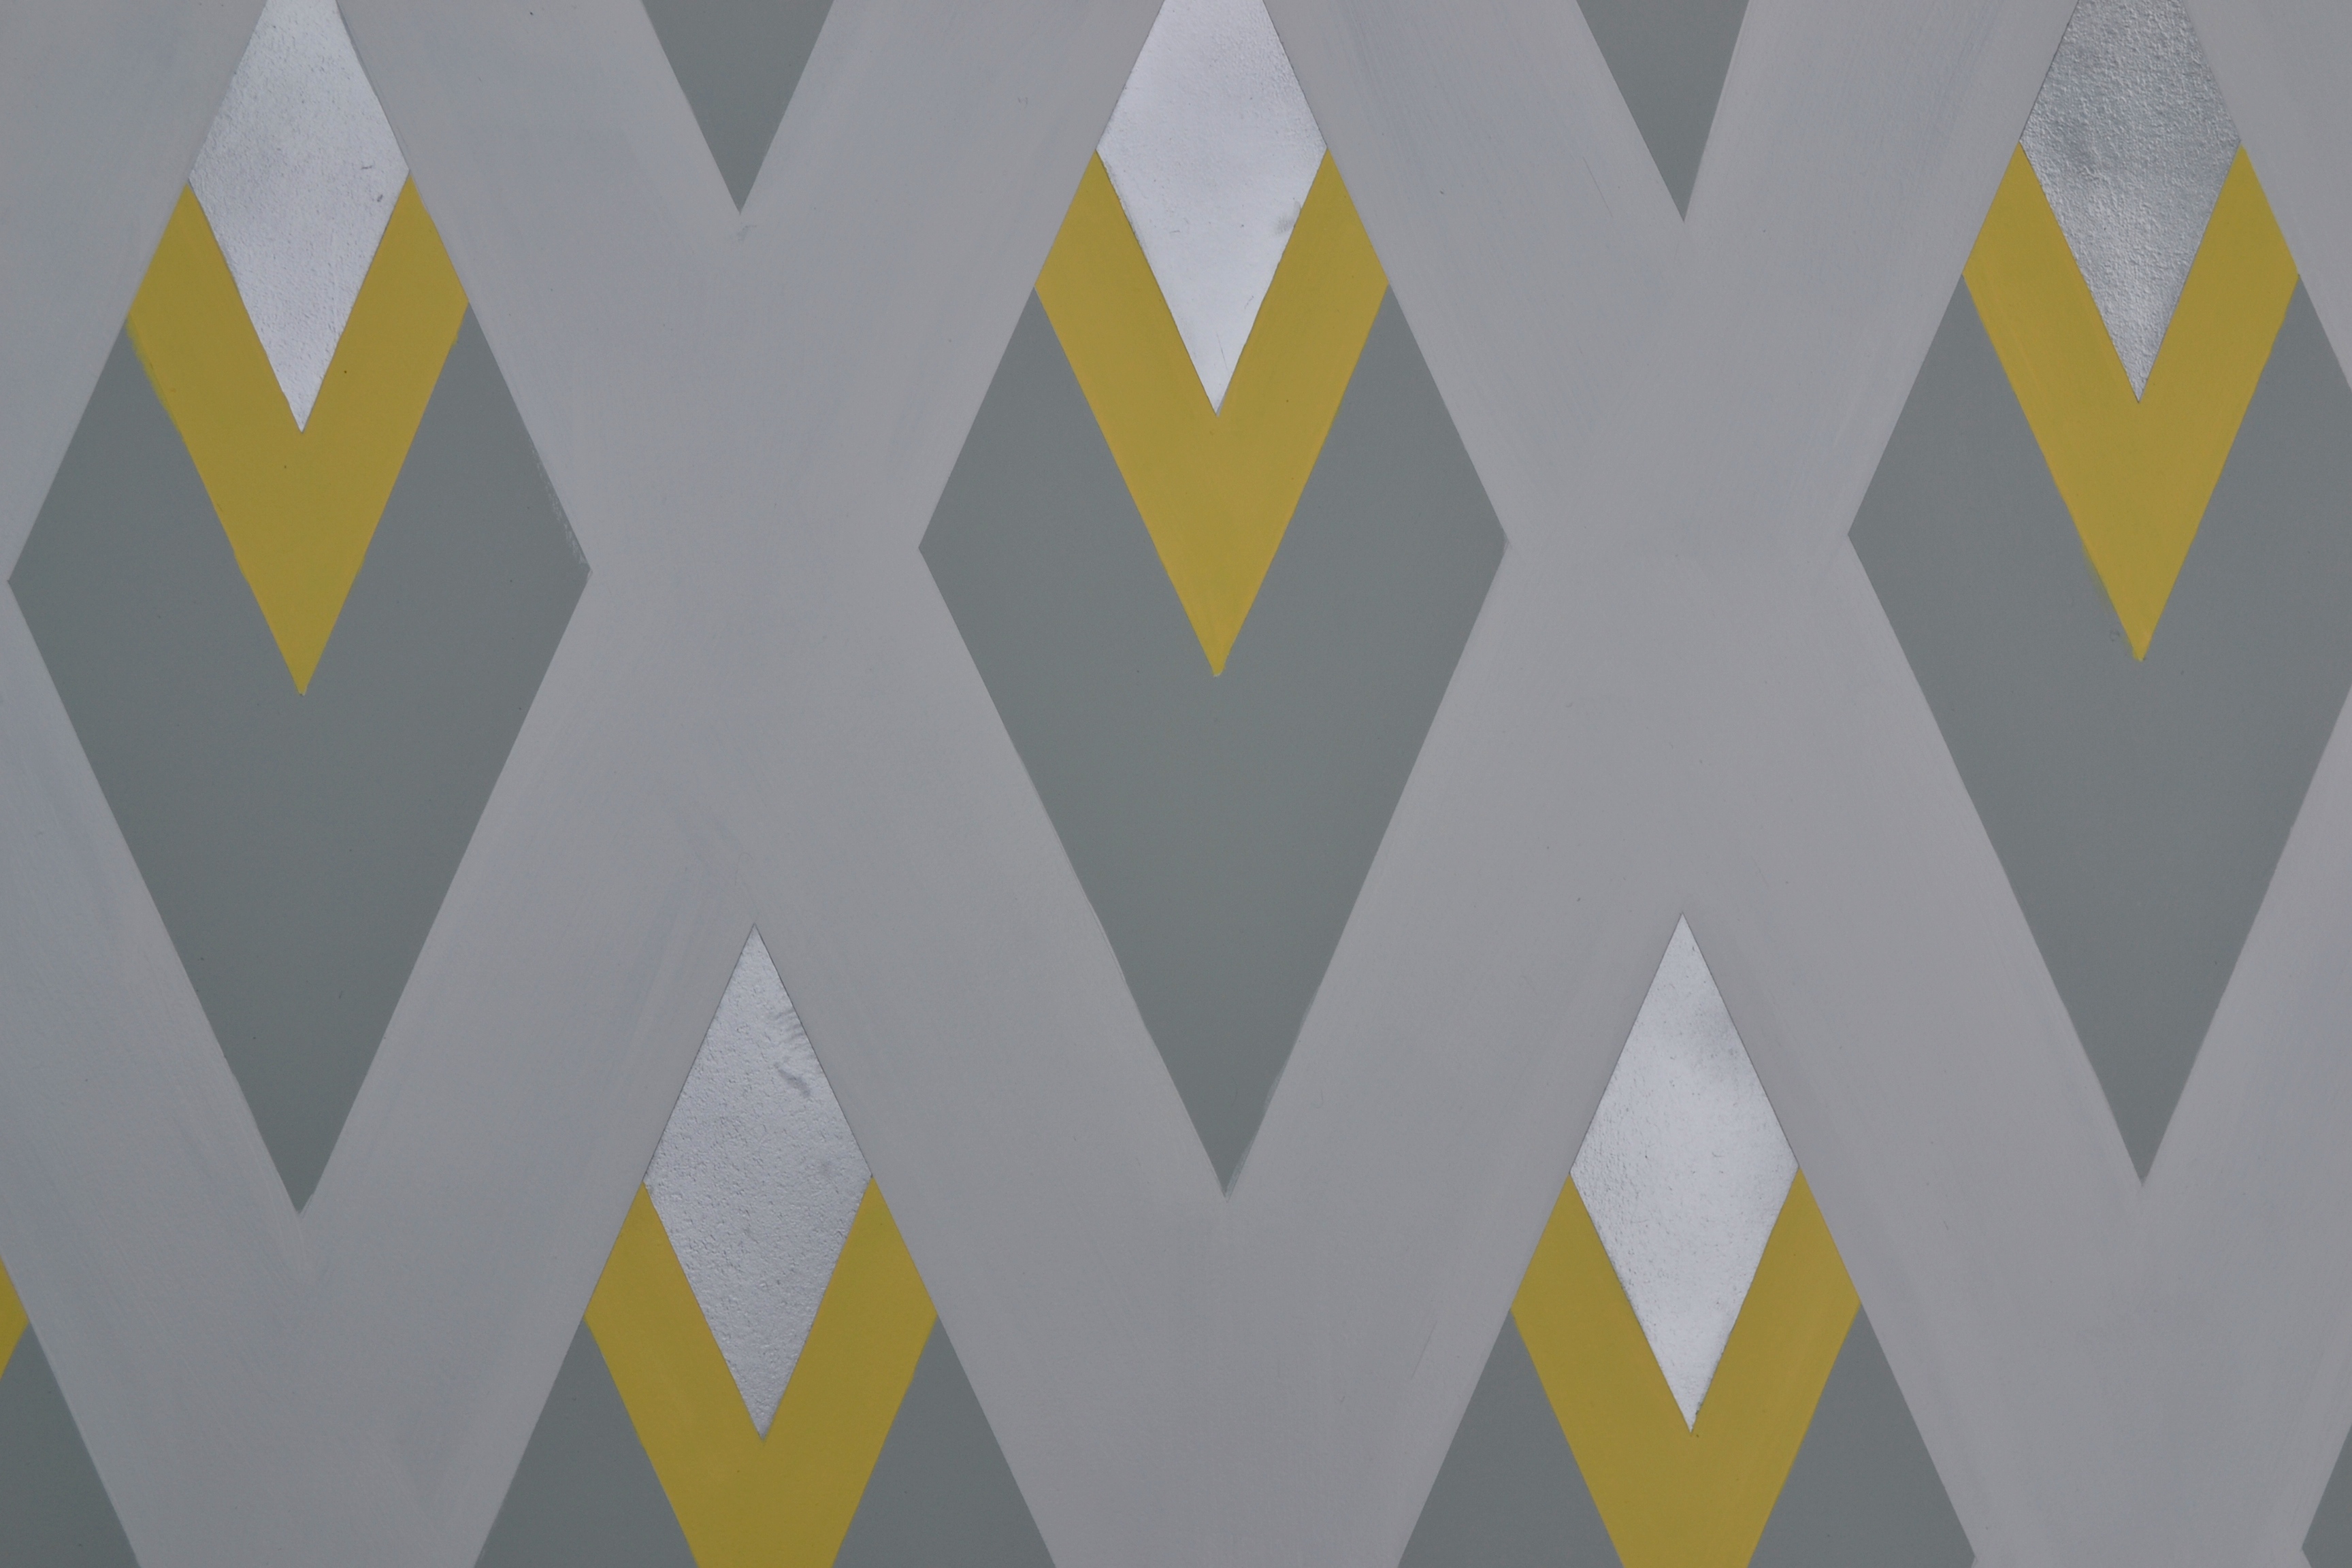
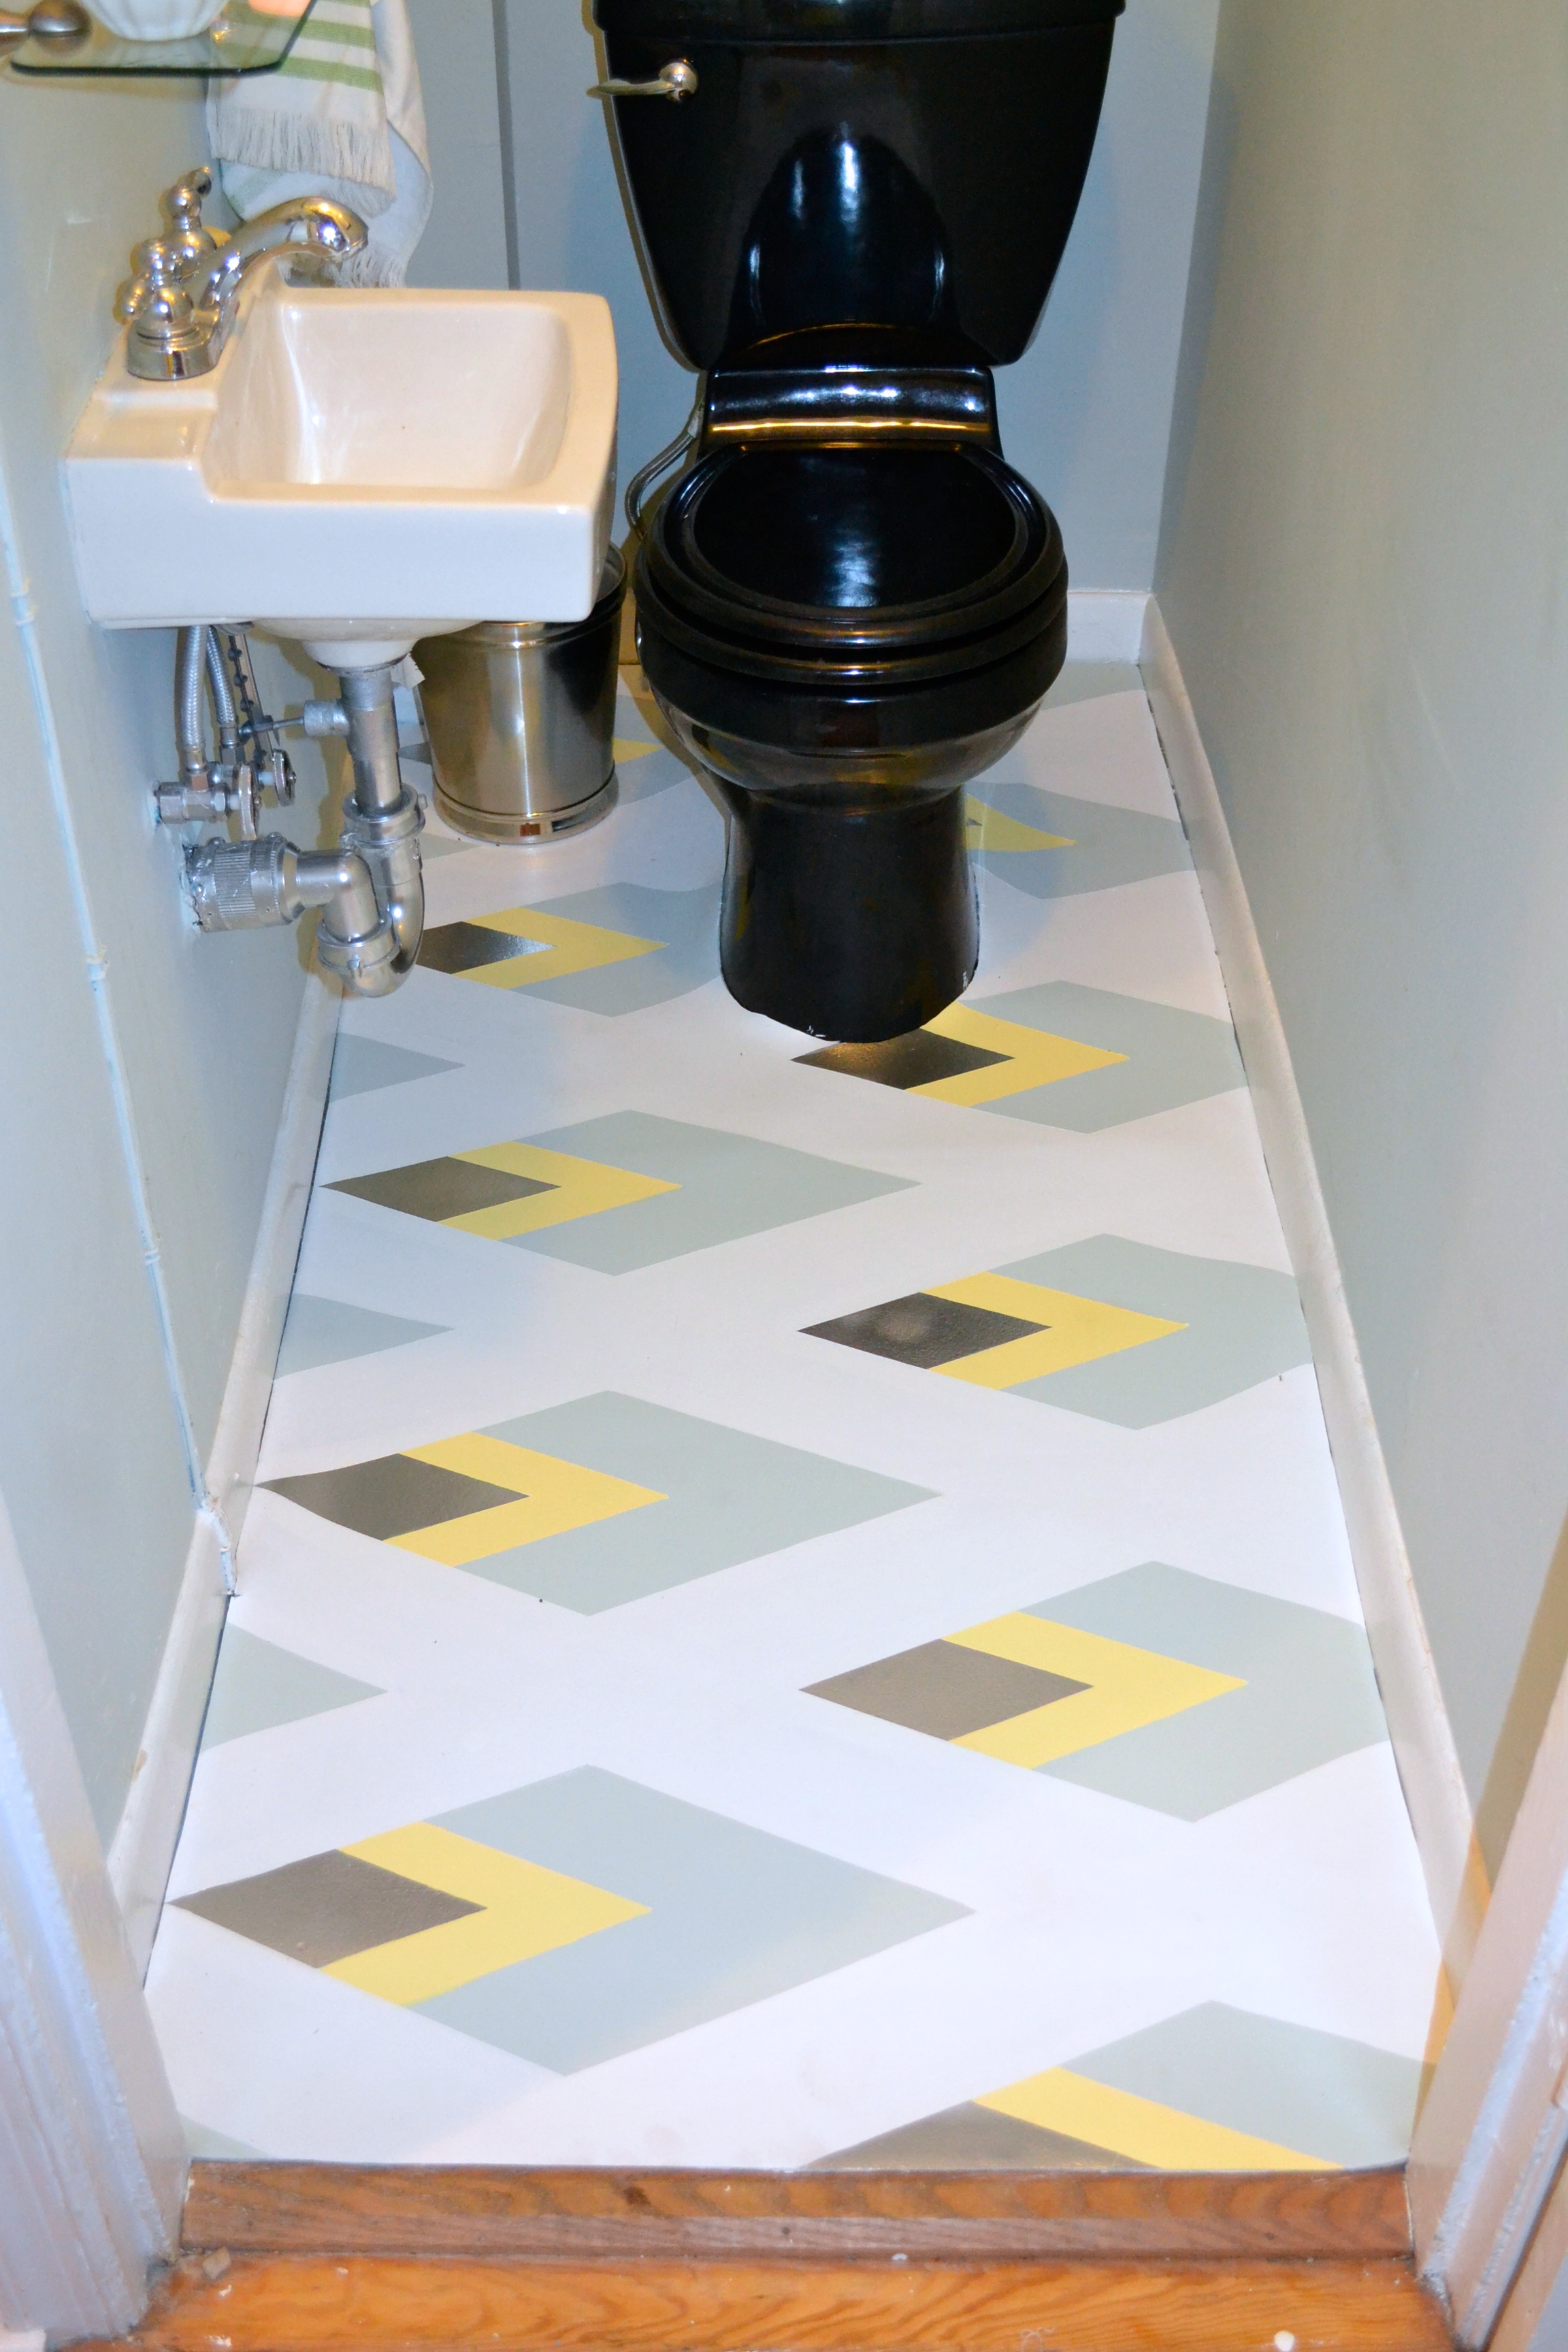
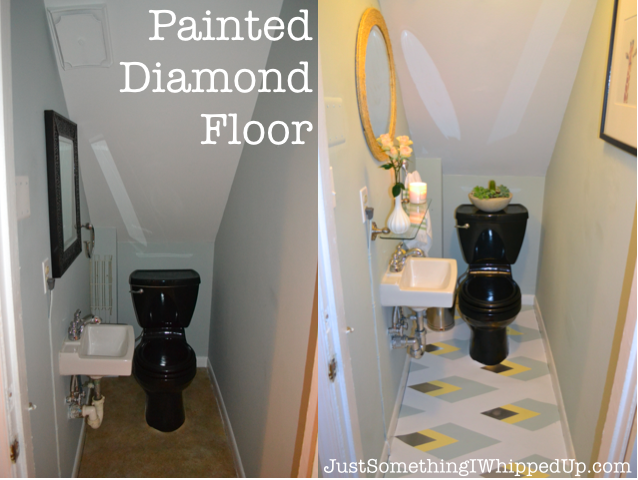
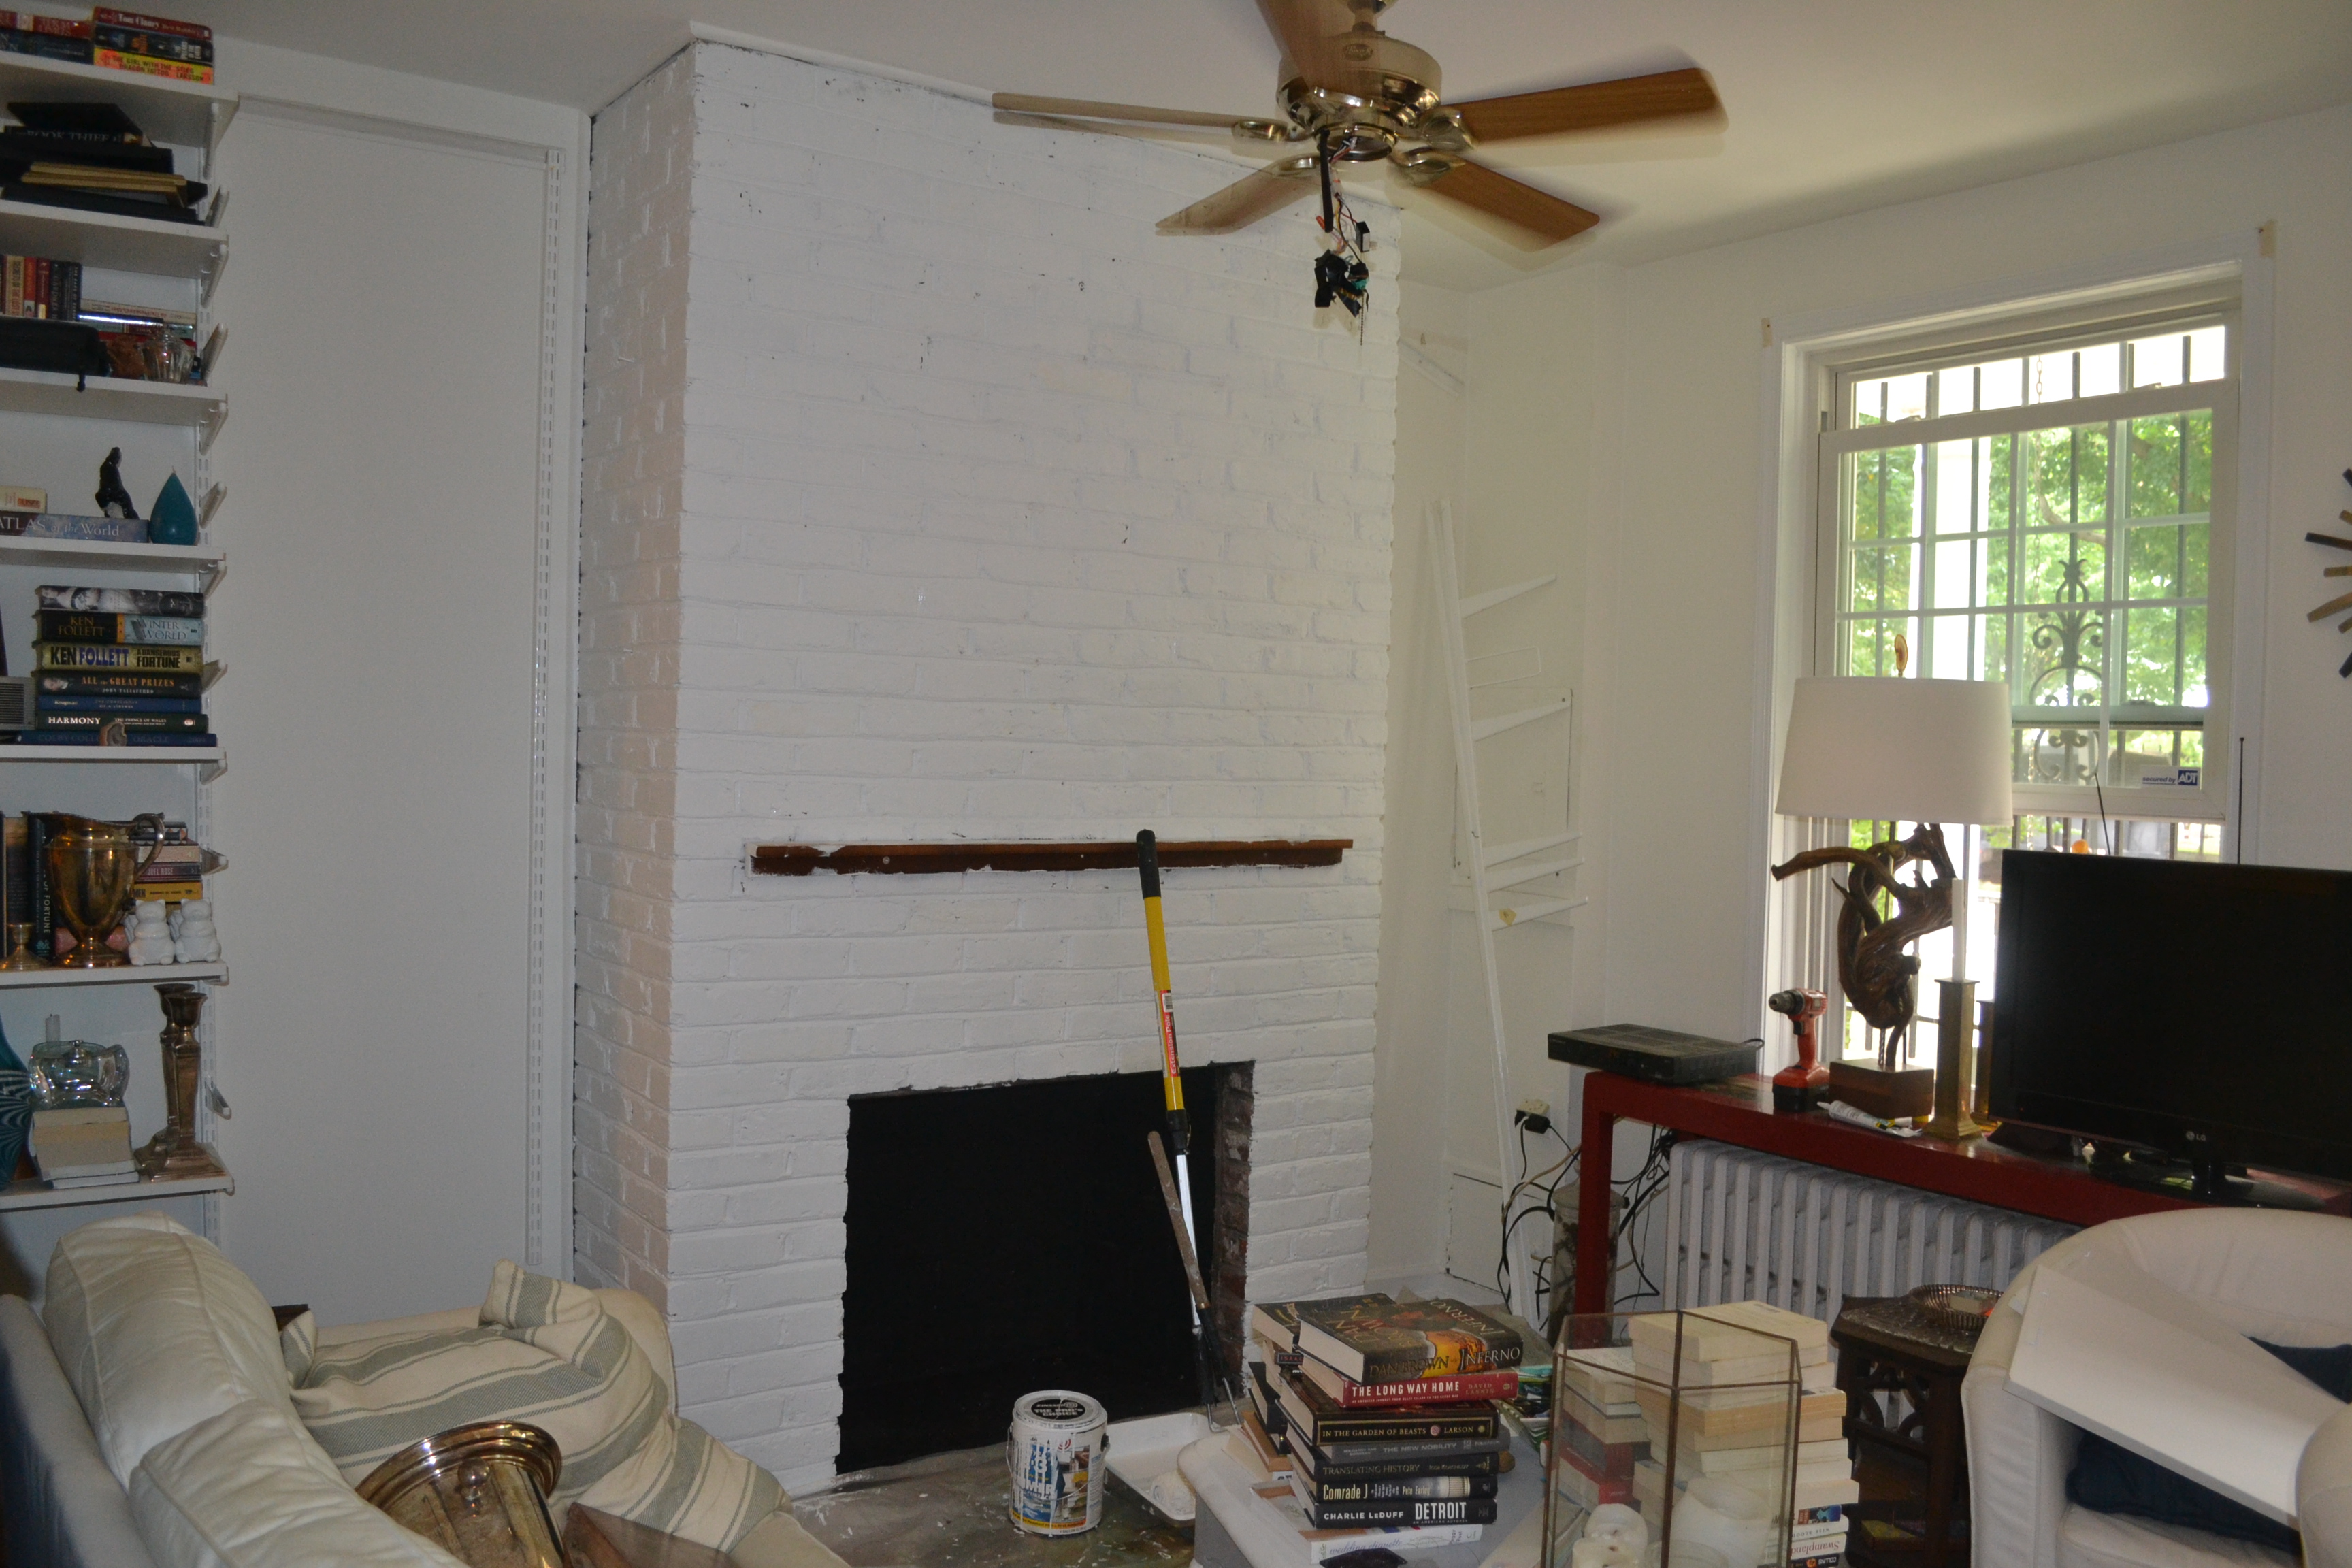
Between that and some technical difficulties with this project, it took a while, but I am ready to tell you about the light fixture I made for our little bathroom. After the sisal mirror and the painted floor, the only thing left was to update the light. Specifically this dated little blob:

Before -  JustSomethingIWhippedUp.com
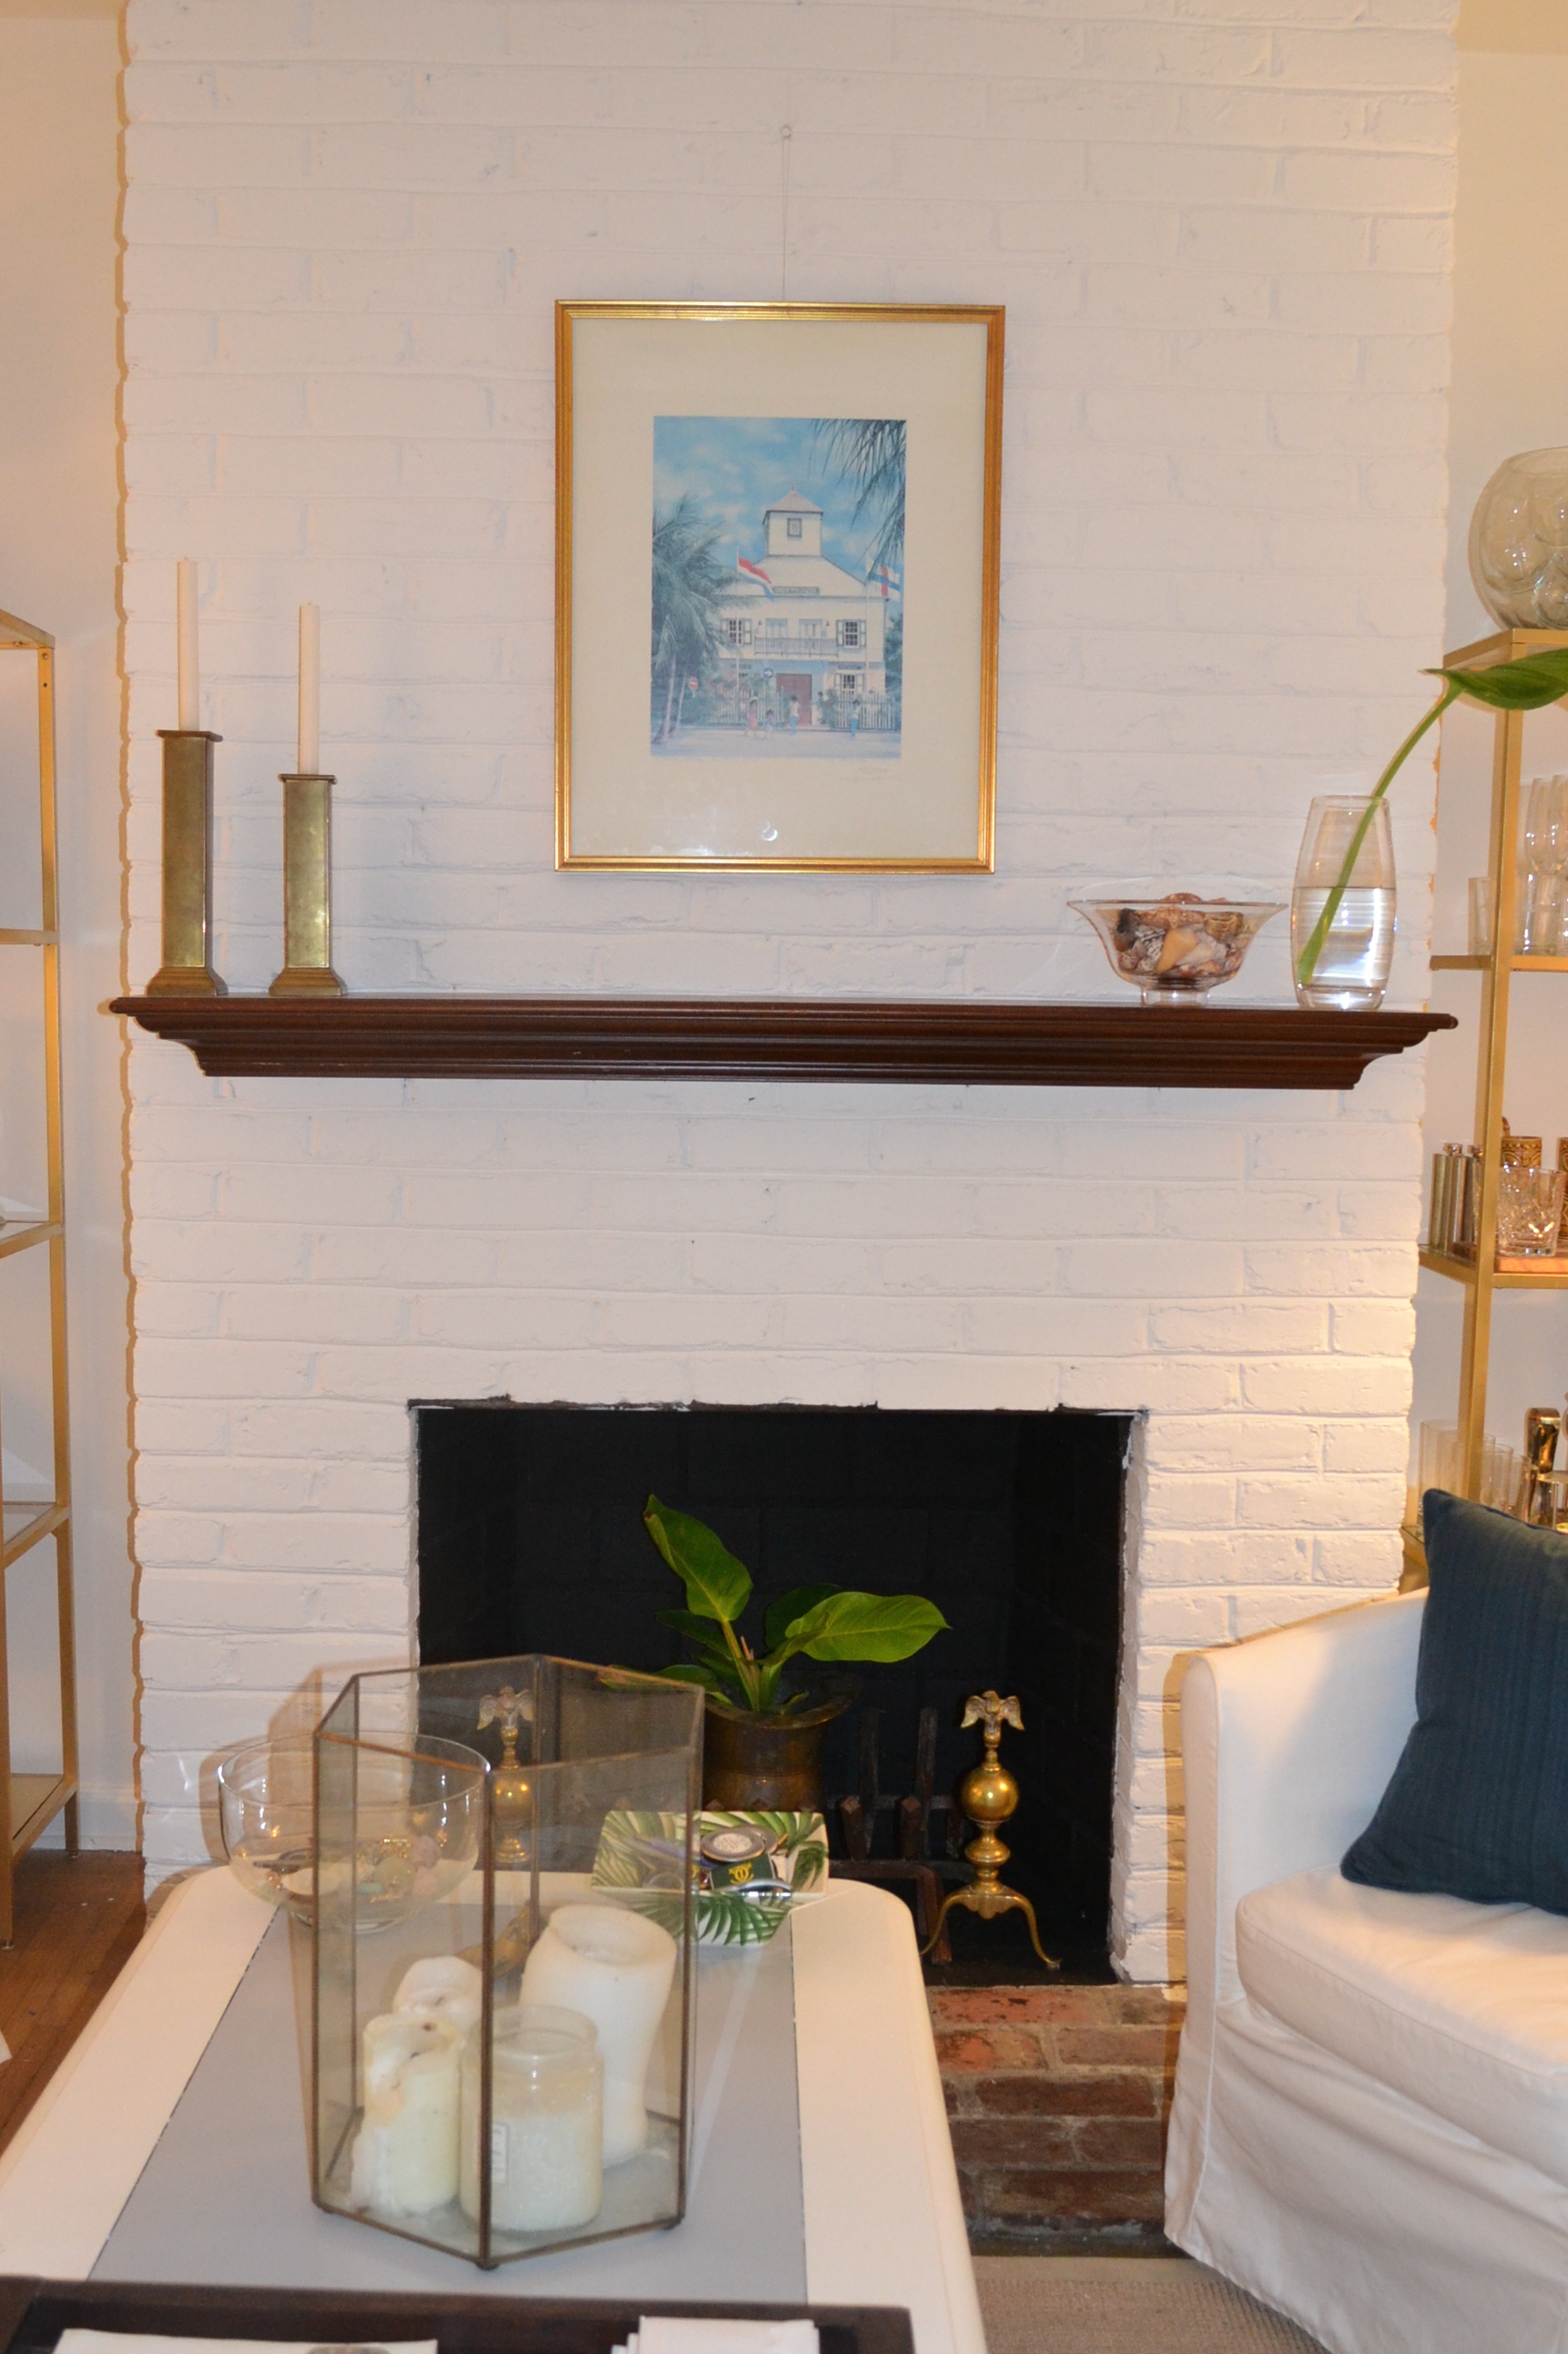
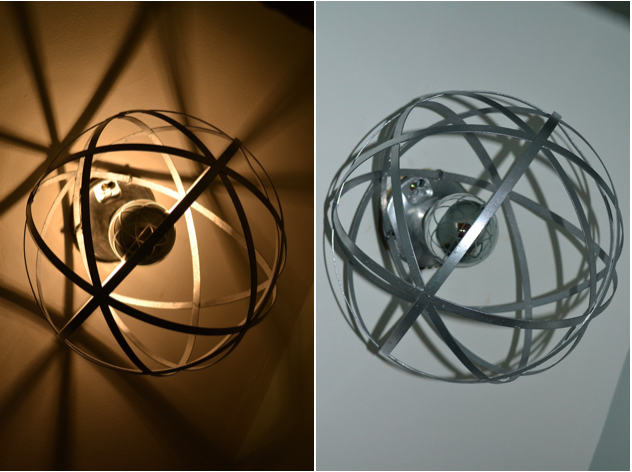
I think this is a little better, do you agree?

DSC_1123

Materials

  • plastic keyless lampholder 
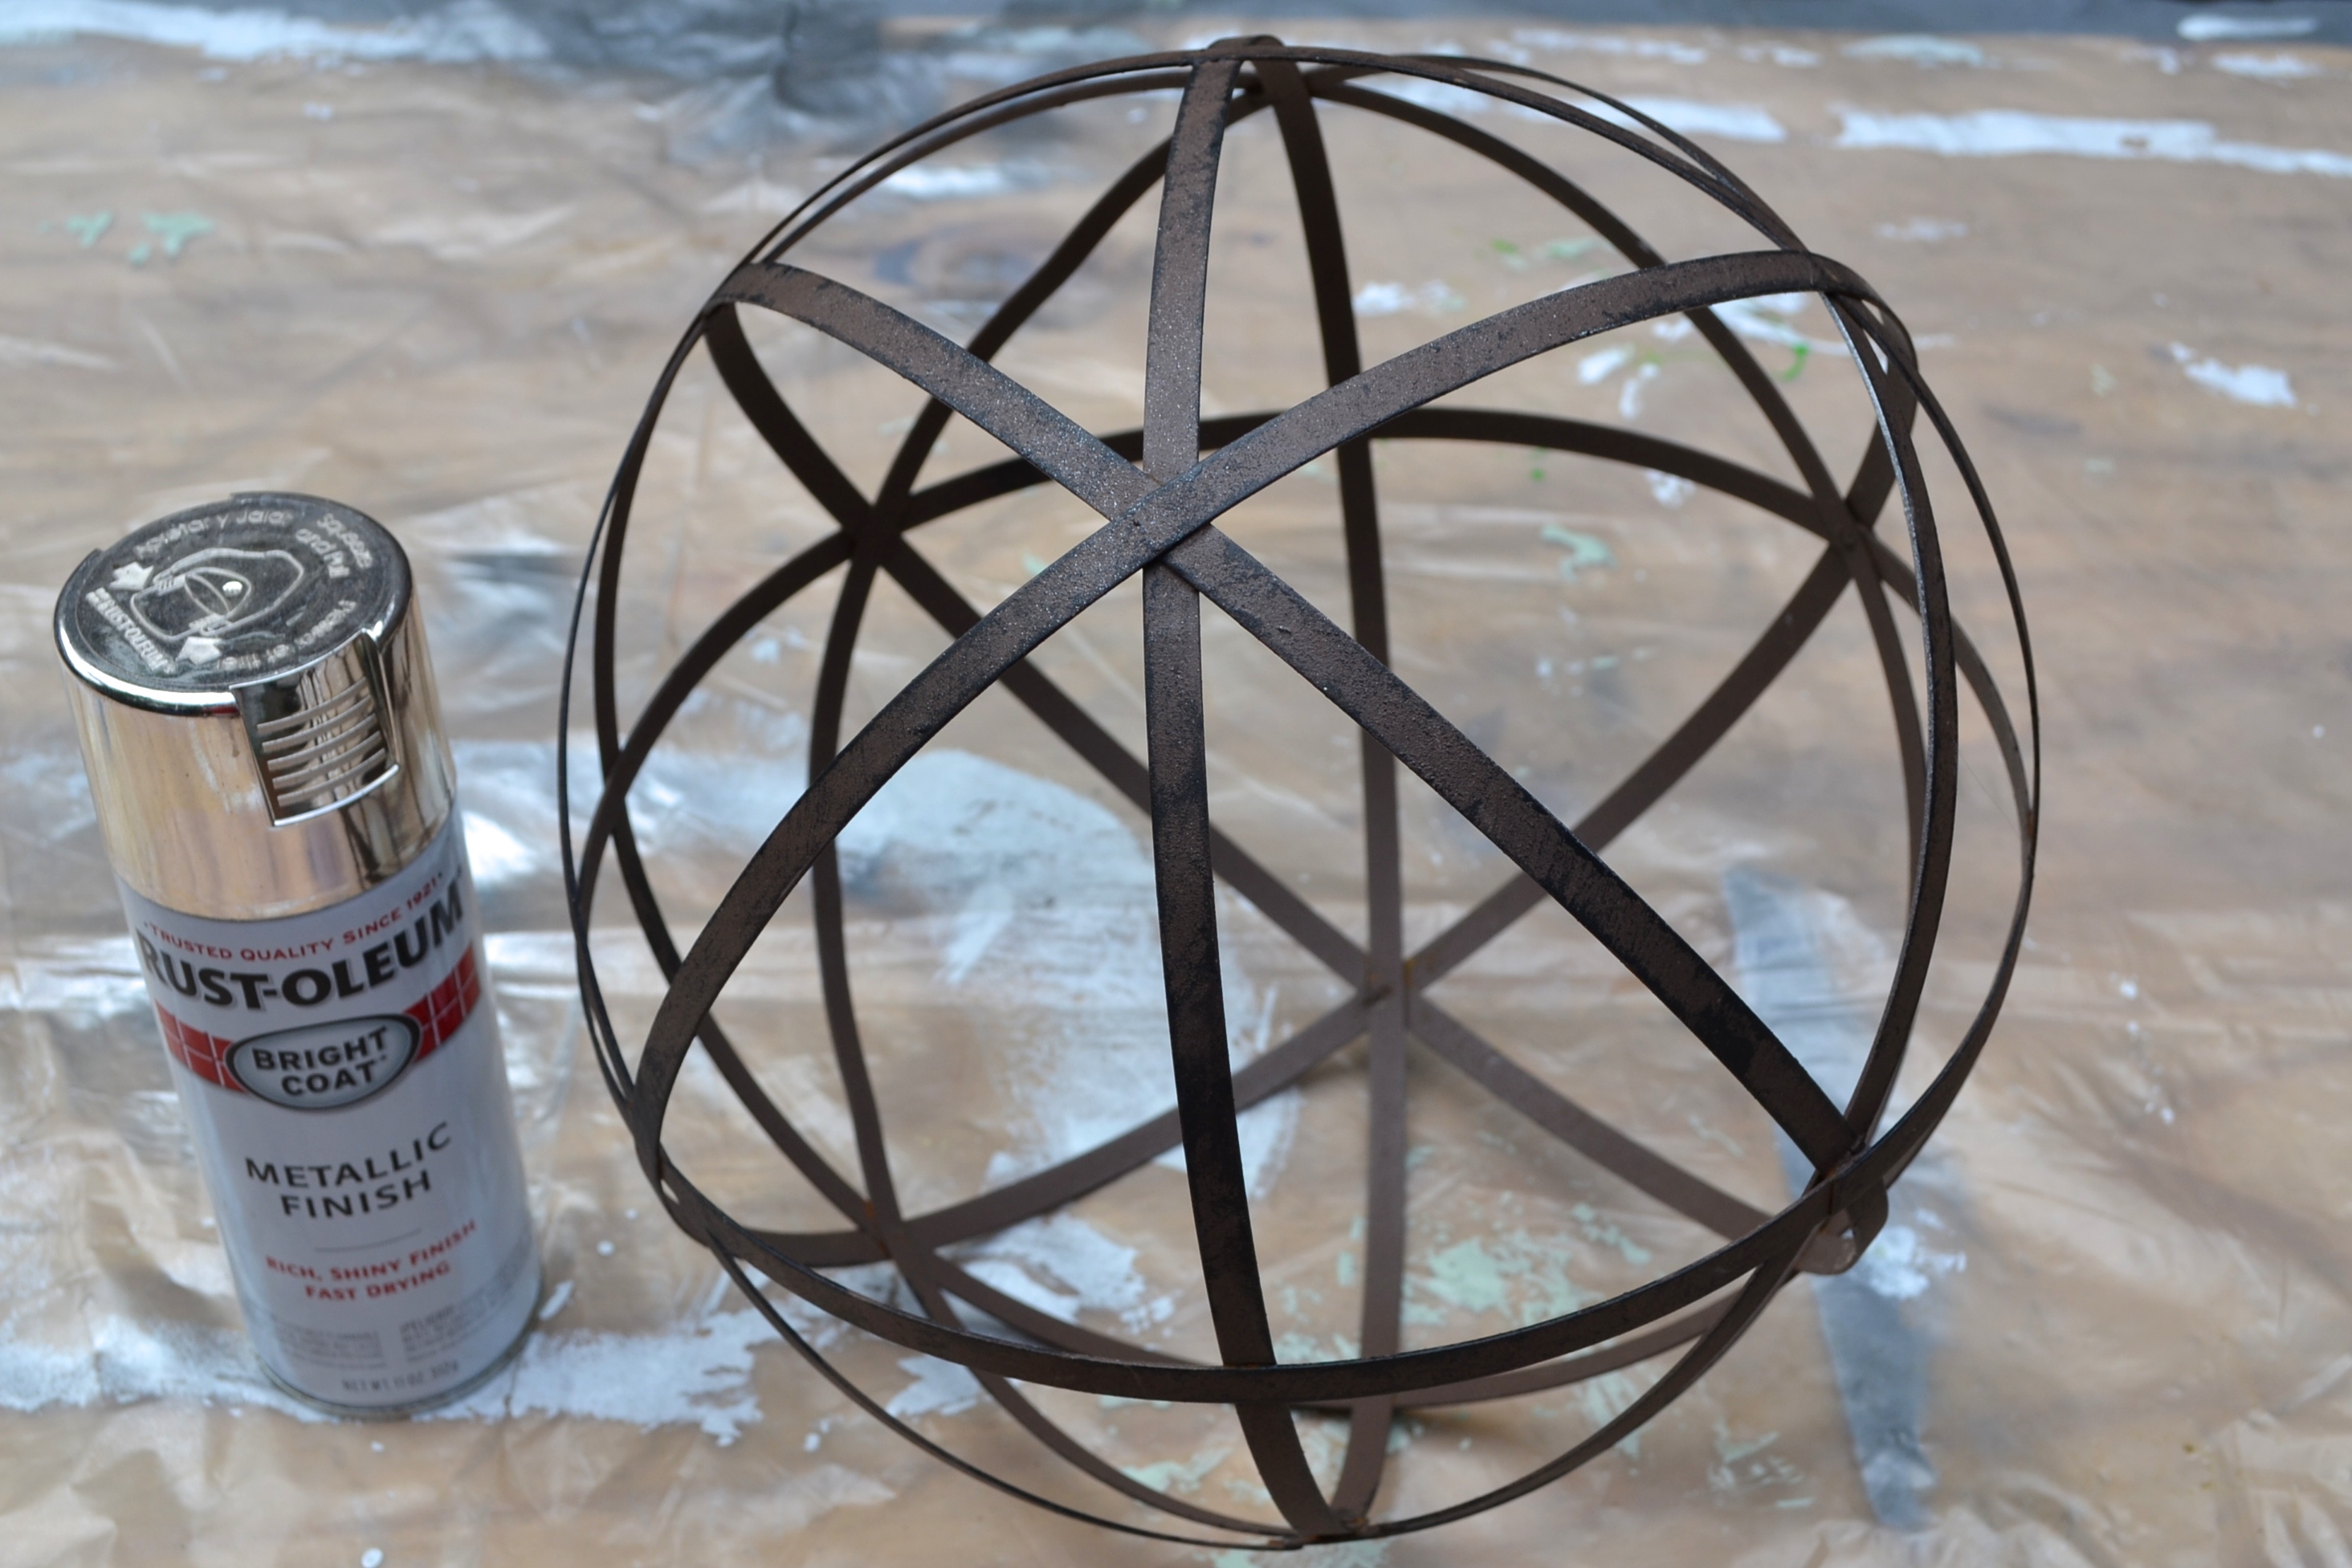
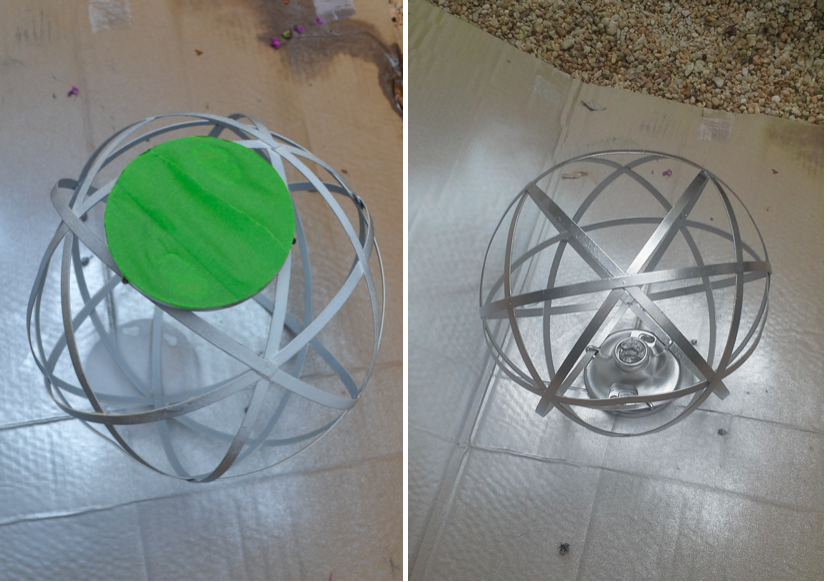
  • Garden orb – I got mine at HomeGoods about 8 months ago, but I have seen some there recently
  • Spray primer for rusty metal
  • Spray paint (with spray paint trigger)
  • Dremel tool
  • Phone cord – not the coiled kind
  • Silver dipped bulb – I used this one 

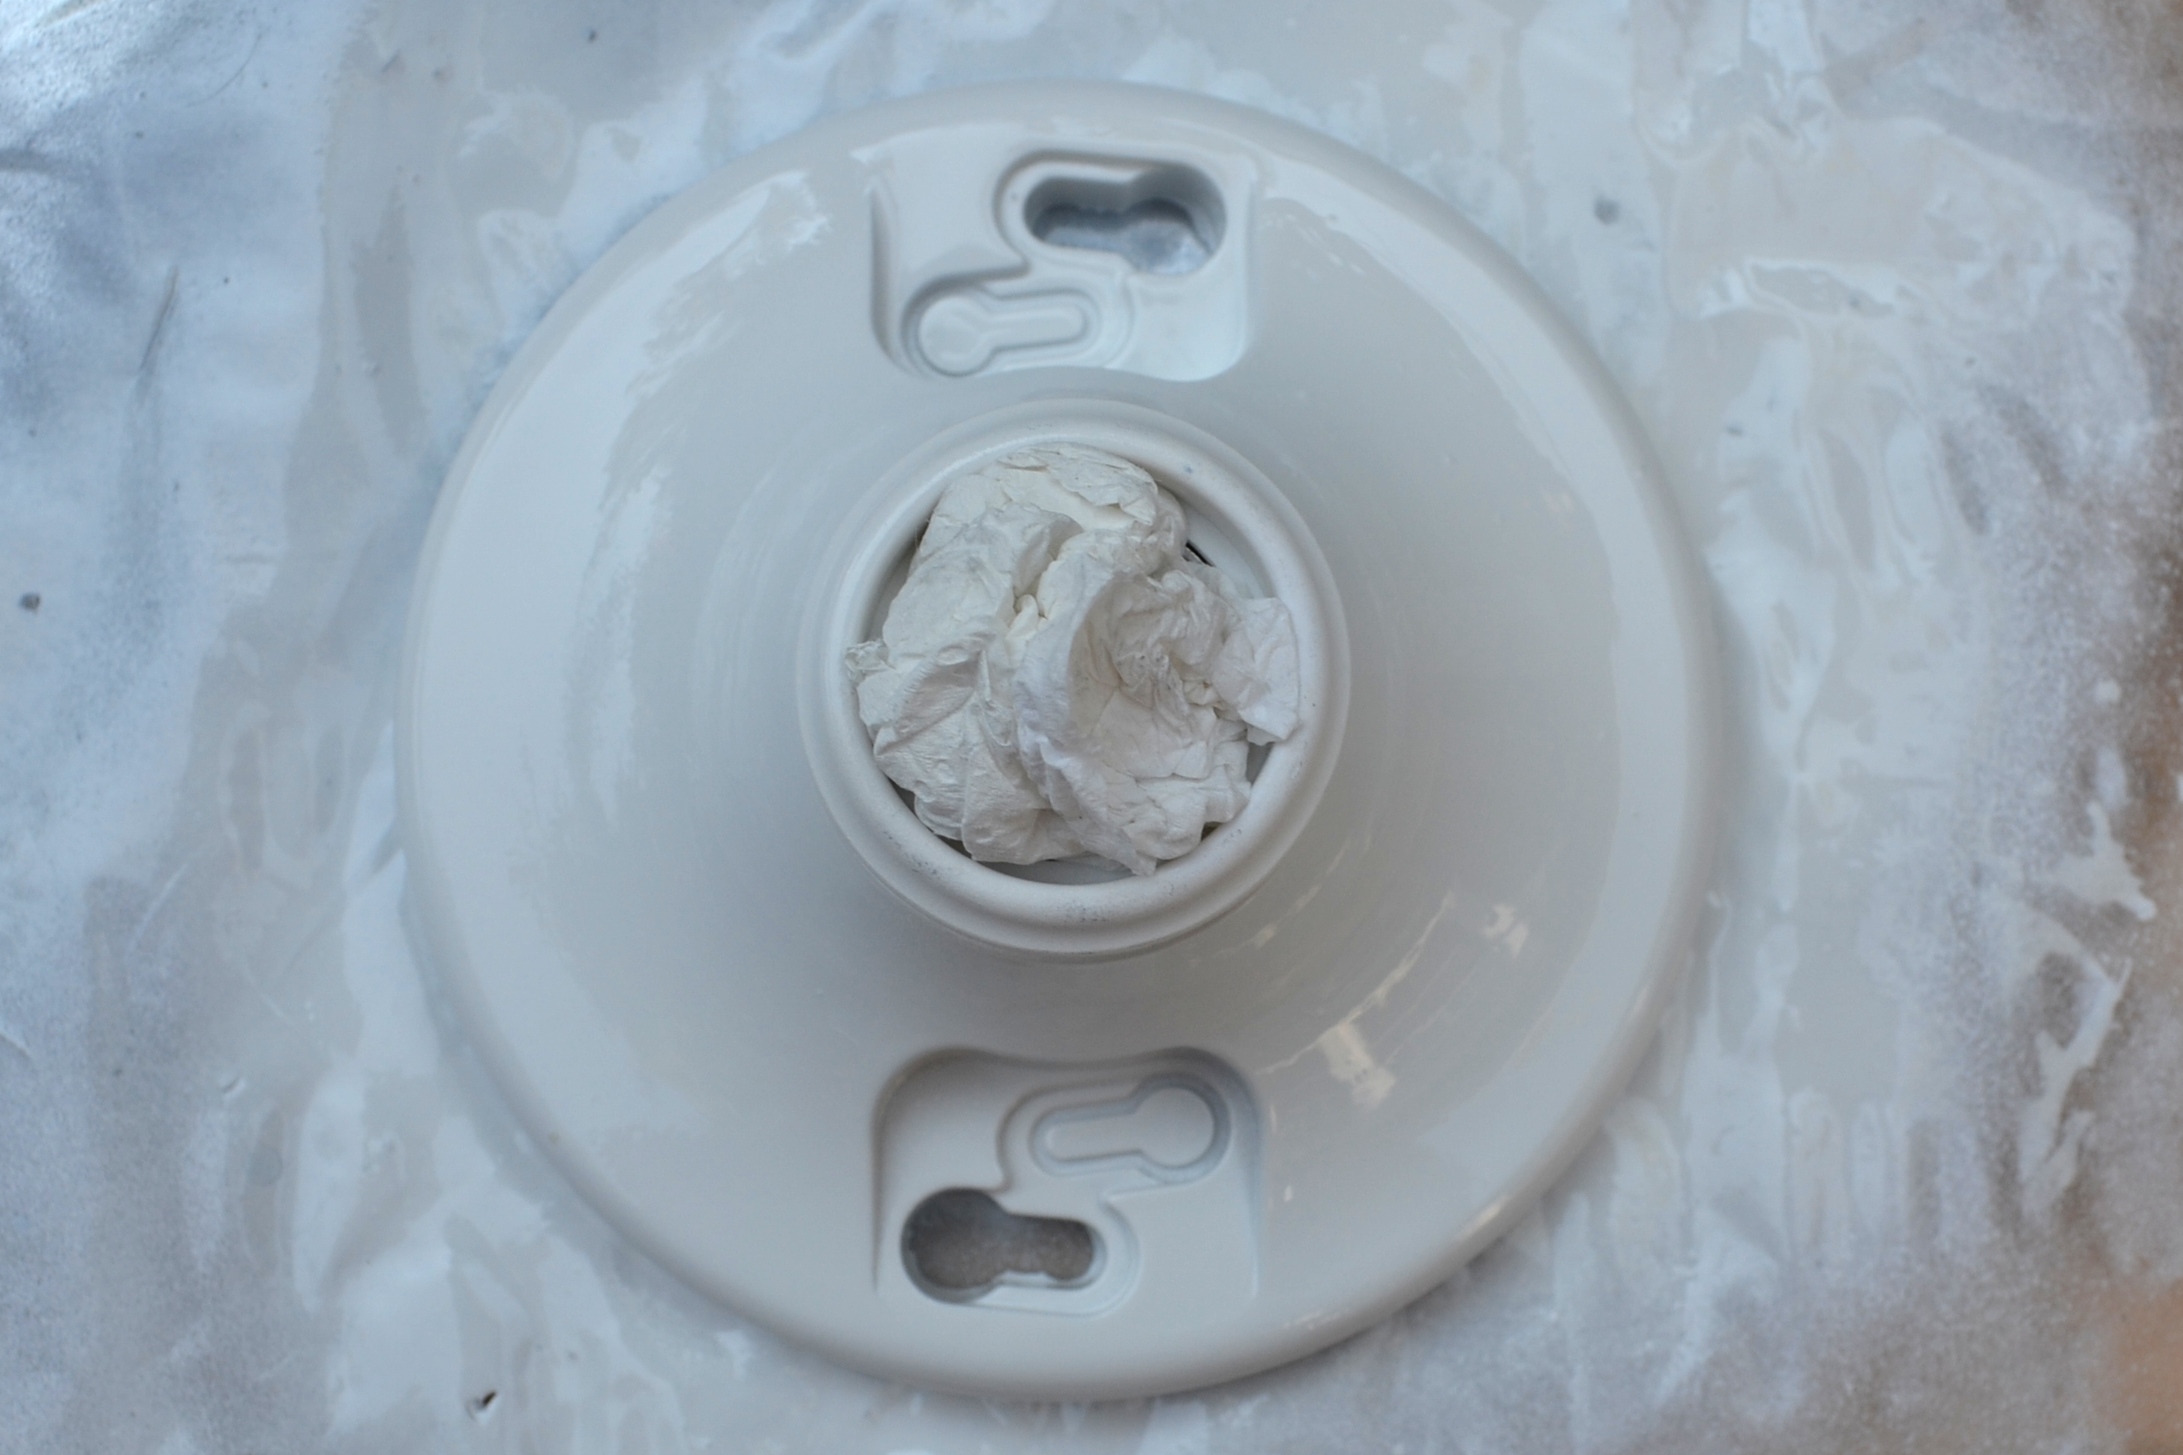
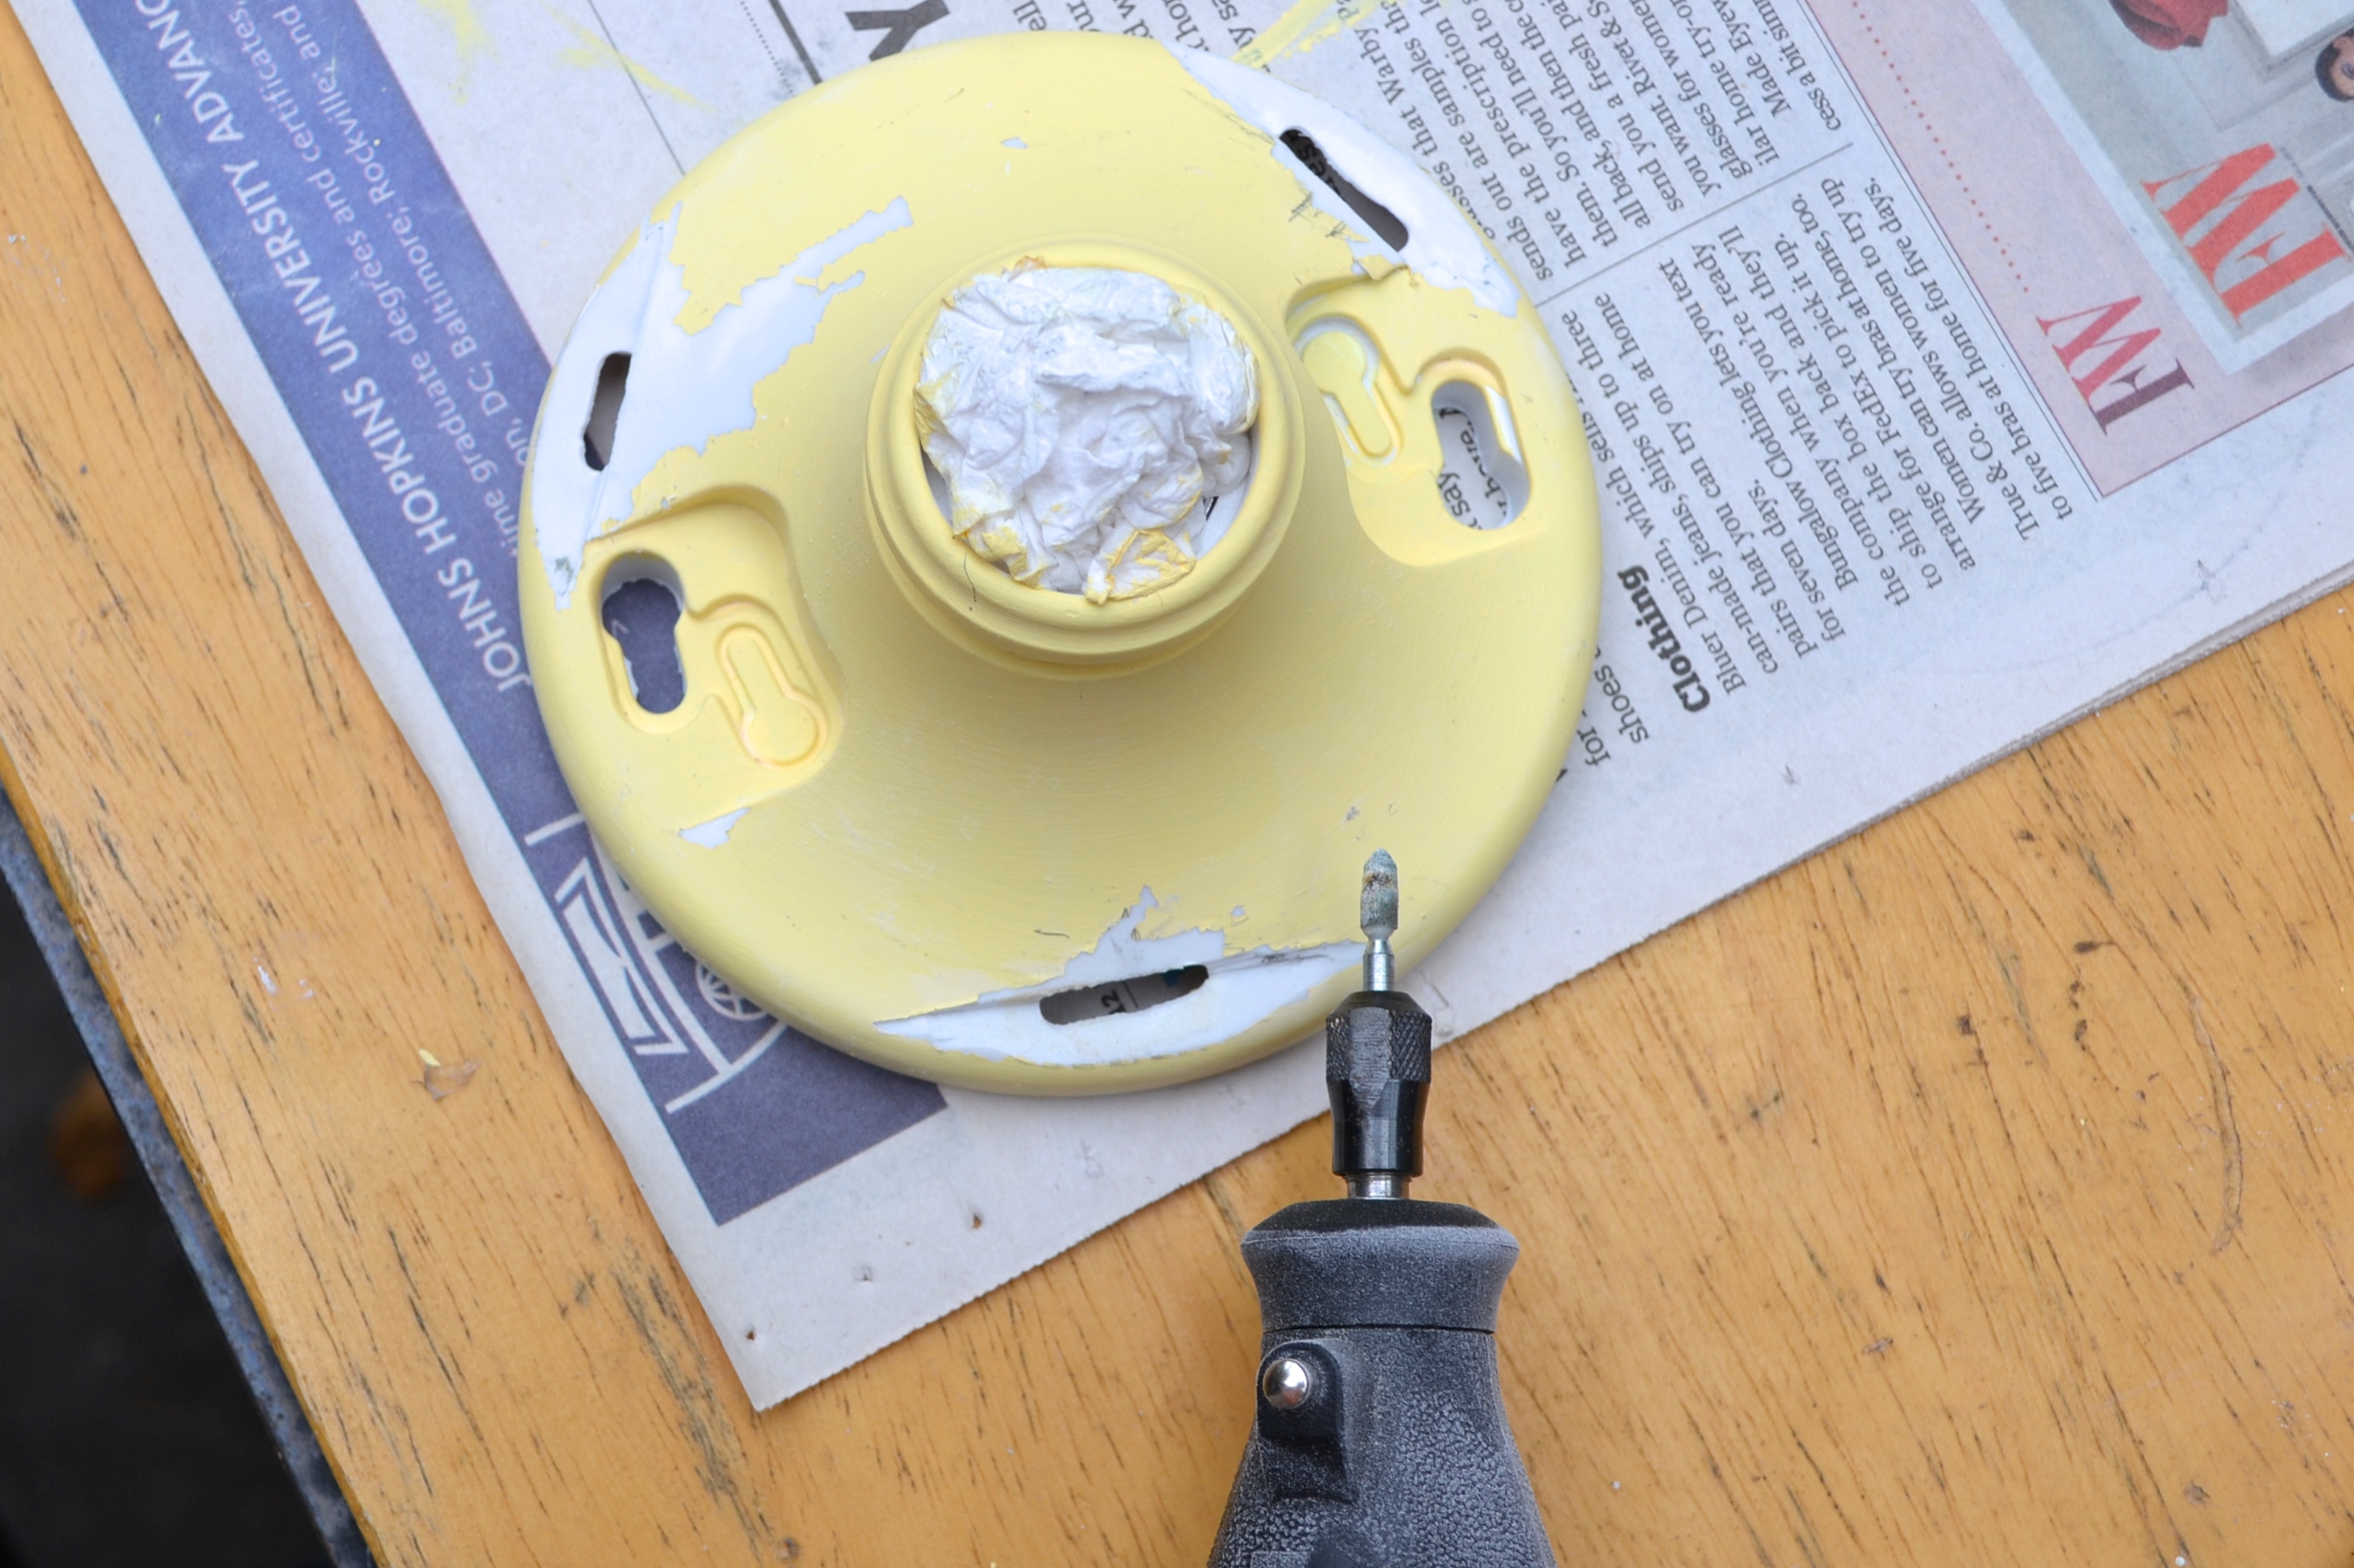
First I primed the orb and socket with primer for rusty metal. I don’t think the existing finish was actually rust, but the the other kind is for clean metal, and this was not clean. I stuffed a paper towel inside the socket, and made sure to paint the inside of the orb completely as well.  Side note – I tried to paint it yellow on the outside and silver inside and it just didn’t work out. So ignore any yellow paint in these pictures.

Plastic Keyless Lampholder - JustSomethingIWhippedUp.com

JustSomethingIWhippedUp.comAfter the pieces dried, I lined the orb up on the lamp holder and drew lines on the lamp holder where the three metal strips touched it. I also marked the strips so I remembered which ones I was using. Important: I made sure the light bulb I was using fit through at least one of the triangles so that I could screw it in.

JustSomethingIWhippedUp.comUsing a Dremel tool with the sanding attachment, I started making flat sections for the straps to rest on. Once I had a nice flat spot, I used one of the finer grinder tips to go all the way through the plastic.

JustSomethingIWhippedUp.com

JustSomethingIWhippedUp.com

JustSomethingIWhippedUp.com

I originally considered gluing the pieces together, but while it might have worked, it seemed flimsy. I then considered wire, but we didn’t have any that looked like it would hold up – the Dremeled slits are still pretty sharp looking. Wire would probably work, but I settled on phone cord because a. we had some, and b. it was easy to pull tight and once wedged in the slots the rubber really made it stay put. I threaded the phone cord out through the hole, around the strap and back down through the hole and repeated for all three straps. The I pulled it as tight as I could, pushed it down around the screw holes and tied it off with a square knot. I shook it around a bit and those pieces are not loose at all.

JustSomethingIWhippedUp.com

I taped over the business side of the socket and I spray painted the whole shebang silver, using a bunch of light coats. I love Rustoleum’s Bright Coat Metallic Finish in Silver. Using a spray paint trigger like this one saves my fingers from some serious cramping when I have to do several coats.

JustSomethingIWhippedUp.com

Stay tuned for my next post on how I hardwired this baby and learned a lot about circuits in the process!

DIY Orb Light Fixture from JustSomethingIWhippedUp.com

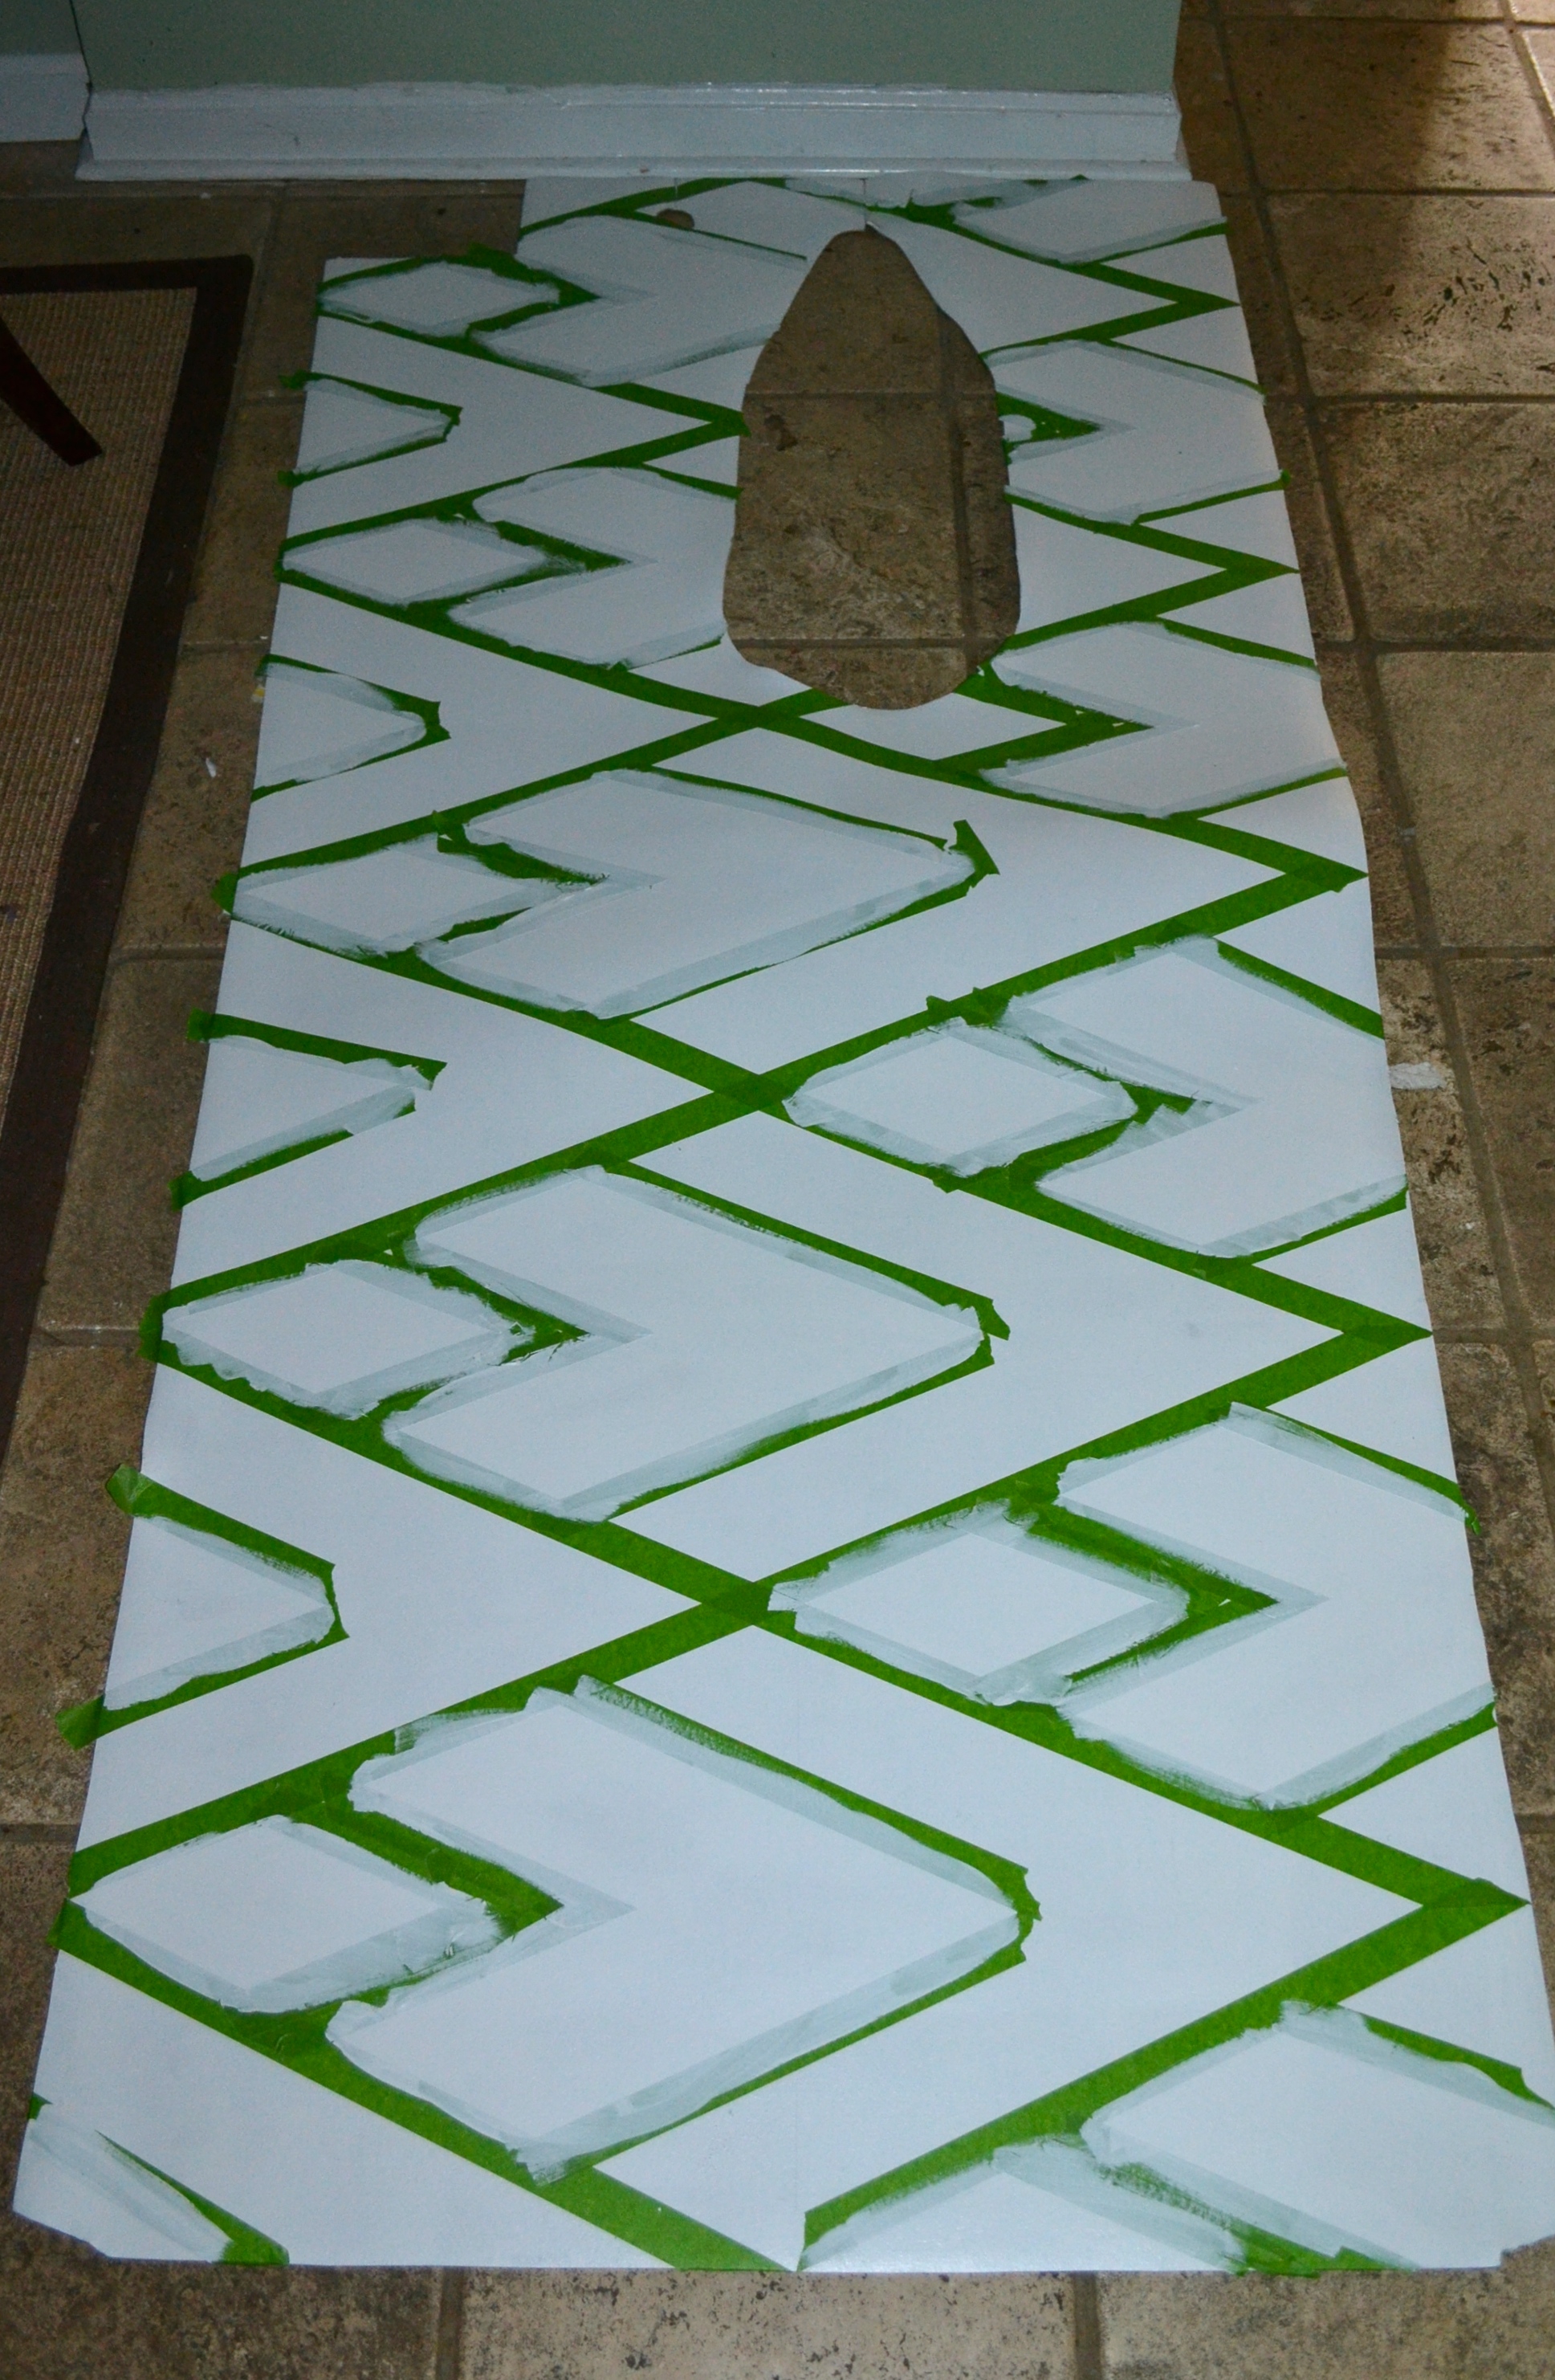
There are a few other things I wanted to do to the bathroom – a coral painted trashcan and some coral details on the door, but no I think it is time to call it a day in there. A tiny space can only handle so many projects before it looks like Pinterest got ill in it and I am getting dangerously close… (Already there?) After telling you how I installed the light, I promise that will be all on this bathroom for a nice long time!

XO

Julia

Screen Shot 2014-11-20 at 2.31.01 PM


Painted Linoleum Bathroom Floor

Hi! I decided it was time to turn my attention to our tiny, neglected downstairs bathroom. The invisible yet defining feature is a trap door under the floor in there that goes to the (terrifying) crawl space under the house. The reason the floor is an unattached piece of linoleum is that we have to fold it back to get to the trap door. I am sure there is a better/more attractive solution to the problem, but we are still in the work-with-what-we’ve-got phase here. The painfully visible feature is the hulking black toilet of doom. Alas, it stays for now…I am basically just pretending it doesn’t exist. This is where we started.

DSC_0629

I think my favorite thing about it is that the previous owners painted it Benjamin Moore’s Quiet Moments, which is possibly the most hilarious bathroom color name ever. Except maybe BM’s Stolen Moments. Luckily, it is a totally inoffensive light greenish, grayish blue. I would love to put some really fabulous wallpaper in there, like Brazilliance, Clarence House’s Congo or Osborne & Little’s Summer Palace. However, those are all serious investments and we plan to redo the kitchen at some point which might mean moving the bathroom wall, so Quiet Moments it is for now. The first thing to go in there was my Animal Print Shop Giraffe, which I love so much. The sink is beyond small and there is hardly room for a bar of soap, so I added a simple glass shelf (this one from Home Depot), as well as the round mirror and a rug.

DSC_0597

The latest round of updates started with the sisal mirror and a few other small projects, including painting the linoleum white. I also spray painted the pipes under the sink and while not as good as actually being all nickel pipe, it’s way better. I was just not feeling the white floor though. That’s where this post’s project comes in.

Diamond Painted Linoleum Floor

Materials:

  • Graph paper and a pencil
  • Paint – I used white, BM Quiet Moments, BM Mellow Yellow and Rustoleum Bright Coat Metallic Finish in Silver
  • Painter’s tape
  • Ruler
  • Math Skillz – or time and patience. I am not blessed with the first or last, but I muddled through
  • 1″ artists brush
  • 2.5″ angled paintbrush

The one good thing about the weird linoleum/trap-door situation is that I could pull the whole thing out and lay it out on the beer die table table extender in the backyard, which opened up a world of options. I decided to paint a pattern on the floor. I originally thought a scalloped pattern of some kind, but I wanted to start that afternoon and so a pattern using painters tape would be easiest. I looked around for inspiration and remembered Mandi’s wall pattern on Vintage Revivals from a few days earlier. I adapted it slightly and sketched it out on graph paper.

DSC_1008

Once I knew what I wanted, I figured out how to translate the pattern on the graph paper to tape on the linoleum. It. Was. Hard. And not made easier by the clouds of pot smoke wafting across our back yard thanks to our neighbors. I started by making large diamonds and then dividing them into smaller ones, using Mandi’s pattern as a reference. The important part is remembering to measure the distances from the correct side of the piece of tape. The diamond points on the sides needed to be 14″ apart, so I had to remember to include the 1″ piece of tape in the measurement. Here it is mid-taping for reference. The small diamonds will be silver, the two-piece think lines are where the yellow will go, and the diamond after that will be blue. The rest will be white.

DSC_0944Once all of the taping was done, I painted white over the edge of the tape in the spaces I was going to paint blue or silver with the idea that any paint that seeps will be white onto white, not the color onto white. It’s a little easier to tell what is going on once that step is complete. It started raining so I had to do the next bits inside.

DSC_0945Once that was dry, I painted one coat of blue and took it back outside. I used spray paint for the silver, so in addition to taping I made a quick stencil which helped a bit with overspray.

DSC_0946

While that dried I did one more coat of the blue and then pulled off the tape where the yellow would go. I ended up freehanding the yellow. By the time I had done a coat of white and two coats of blue, there was enough of an edge that it made the cutting in much easier.

DSC_0951As I expected, when I pulled off the tape, the white was looking pretty dingy – there was a lot of erasing, leaning, handprints and some silver overspray. I went back over the white with one more coat and let it dry, and brought it back into the bathroom. Here she is!

DSC_0956


DSC_0982

DSC_0977And a quick before and after

Painted Diamond Floor by Just Something I Whipped Up

Things are looking up in there!

XO, Julia

Screen Shot 2014-09-29 at 5.31.04 PM

The Nuclear Option

Hi! I am EXTREMELY excited about this post. It blows the last post out of the water and basically renders it moot. You see, while I was fussing around trying to make our living room brighter despite the lack of light and the dark brick, there was one other option that Sam and I had been kicking around without being ready to pull the trigger. I give you The Nuclear Option:

Painted brick fireplace by Just Something I Whipped UpInstead of trying to mitigate the brick, we painted it white. While we were at it, we painted the walls white, got rid of the Elfa shelves that we inherited from the previous owner and painted the tv console table. The whole thing sort of snowballed – kept saying “should we paint this while it is out? – and suddenly we had a whole-room makeover on our hands.

Painted Brick Fireplace by Just Something I Whipped Up

Painted Brick Fireplace by Just Something I Whipped Up

Painted Brick Fireplace by Just Something I Whipped Up

Painted Brick Fireplace by Just Something I Whipped Up

Today I will talk about the brick painting part and cover the shelves next time.We had been hesitant to paint the brick because we do plan to sell the house at some point – it is pretty tiny – and we didn’t want to do anything that future buyers might not like. You know, the value of exposed brick and all. I was the very first thing I wanted to do when we moved in but we hemmed and hawed and put it off. If it was our “forever house” it would have been a no brainer. With the encouragement of some friends who know what they are talking about – both design and real estate wise – we decided to do it. It was not nice looking brick and the opposite wall is still (nice-looking) brick down the full length of the house. This is the view of the side of the room opposite the fireplace. Thrilling, I know. I have plans for it but have not gotten around to executing them.

DSC_0781

And lastly, it just looks. way. better.

Now to the nuts and bolts.

Supplies

  • Dropcloth
  • Painter’s tape
  • Primer (we used Zinsser Bullseye 1-2-3)
  • Roller with 1″ nap for textured surfaces
  • Flat latex paint in white (we used Benjamin Moore Extra White)
  • Paint trays
  • 3″ Paintbrush (medium quality – it will probably be ruined but you don’t want hairs in the paint job)
  • 1″ Artist paintbrush
  • White paintable caulk

First we lifted off the mantel which luckily was super easy. Then we spread the dropcloth around the chimney and used painters tape to secure it. We knew we’d be painting the walls and the ceiling is already white, so we decided to skip taping those off. We rolled on a coat of primer. The thick nap picks up SO much paint. After the first coat, we decided to only use one roller because using two was a huge waste of paint. After the first coat went on, I used the larger paintbrush to get primer into the mortar lines where the roller couldn’t reach, and around the edges. Then I went back with the 1″ artists paintbrush to get the even tinier spots.

DSC_0732

There were lots of nail holes in the chimney that became extremely prominent once the bricks were white. I filled the nail holes with paintable caulk and while I was at it, realized how much better it would look if the spaces between the chimney and the ceiling and walls were filled as well, so I went around those with caulk as well.

DSC_0739After about 2 hours we repeated the painting steps – rolled on and then touched up. The next morning, I rolled a coat of flat latex paint over the primer and touched up around the edges, but didn’t need to go back with the small paintbrush because the little crevices were already white and I couldn’t tell where I would need to touch up. Darn.

We planned to leave the apron until everything else was done so that we could stand on it while we painted the rest. However, when it came time to paint it we realized that we really liked having just a bit of the brick left. Once the paint was dry we popped the mantelpiece back on and moved on to the walls. And there you have it. I could not be happier with it. It is basically a whole new room.

DSC_0720 Painted brick fireplace by Just Something I Whipped Up

The Nuclear Option

I will be back tomorrow to tell about our awesome new shelves!

XO,

Julia