Ugly Dresser Turned Swan

I am back! I may have been silent, but I have been busy and I am excited to share what I have been up to. Since I last blogged I found a really cool new job, which has really cut into my project time, but I suppoooose it’s a good thing.

We have been slowly but surely working on turning our bedroom into a place we actually like, instead of a perfectly fine, but not super functional spot. Part of that process (which I will share in upcoming posts) was finding a bureau that fit in the nook to the right of the fireplace. A simple task you might think, but no. I was even willing to buy something new! (Gasp) But alas, nothing I could find fit the dimensions. I wanted to get the largest bureau that would fit, and the deck was stacked against me, until I came across this monstrosity beauty at the Eastern Market flea market. In all her orange glory. Woof.:
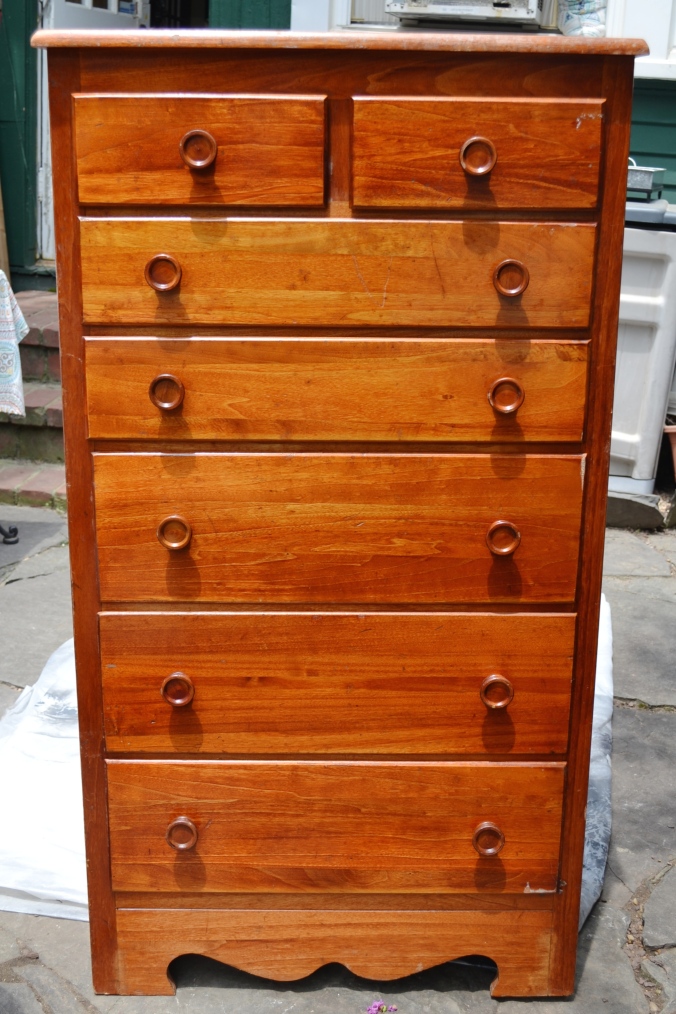
Dresser Before

This was going to require some major surgery. I gathered my arsenal and got to work. Here is what I used.

  • Random orbital sander and tons of discs
  • Paint stripper
  • Gloves
  • Chip brushes
  • Scrapers
  • Empty paint can for nasty chemicals
  • Mask (no really, USE IT)
  • White paint/brushes
  • Stain/Brushes
  • Fine grit sandpaper – I like 220
  • New knobs
  • Jigsaw

First I took out all of the drawers and removed and chucked the knobs. Then I stripped the orange finish off, following the instructions on the can. Basically glop a good layer on, let it sit BUT NOT DRY and then scrape off the gunk. I let it dry by accident because I am a dummy and it was a whooooole thing. After a couple of rounds of stripping (breezing over what was a fairly laborious process) I sanded the whole thing down. I planned to stain the drawers and top, so I made sure no hint of the orange remained on those.
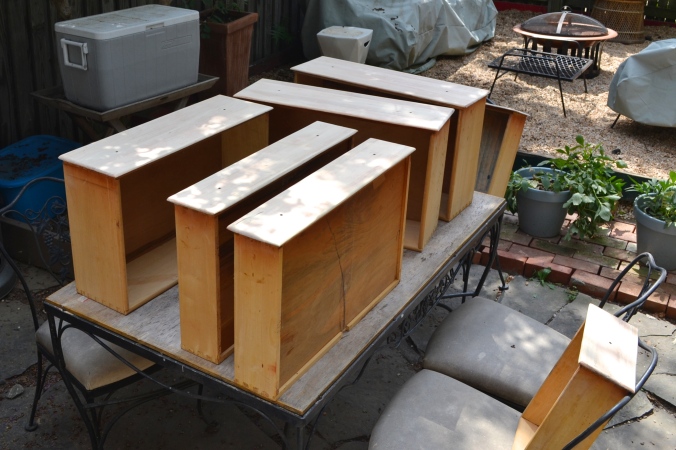
Dresser Drawers

Once I recovered and my nostrils stopped stinging, I used a large oval platter to trace an arc around all of the scrolly-business at the bottom. I jigsawed out the scrolly-pieces and sanded down the edges, leaving a pretty good looking bottom, if I do say so myself.

And with that, I was down to “blank slate” status. I painted the frame part with a couple of coats of regular Benjamin Moore Ultra White, sanding between coats. I stained the top and fronts of the drawers with several coats of MinWax in Special Walnut. Brush on, let sit, wipe off. Repeat. I may seal it with paste wax at some point, but it has a been a few months and so far it is holding up well.

The bureau needed 12 knobs and trying to find cool ones that didn’t break the bank was tricky. I found a few candidates at the usual sources, but the thought of putting over $100 in knobs on a $60 dresser just hurt. I finally found these at D. Lawless. They are actually my favorite and somehow they were on sale for $.50 each at the time (down from a whopping $1).
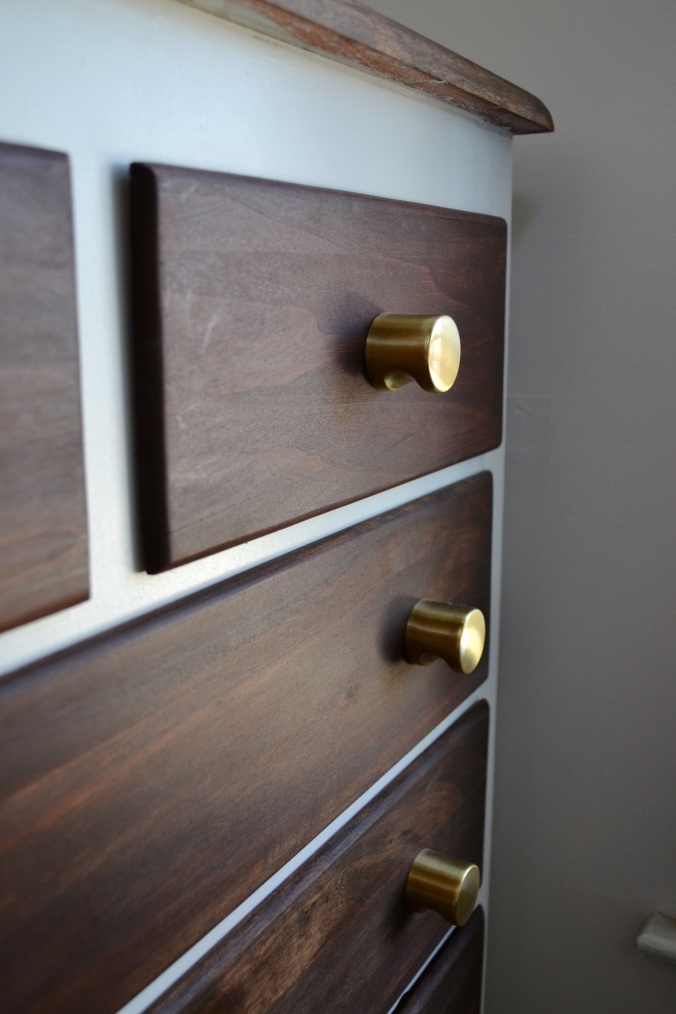
Dresser Knobs

So, all put back together, here she is!
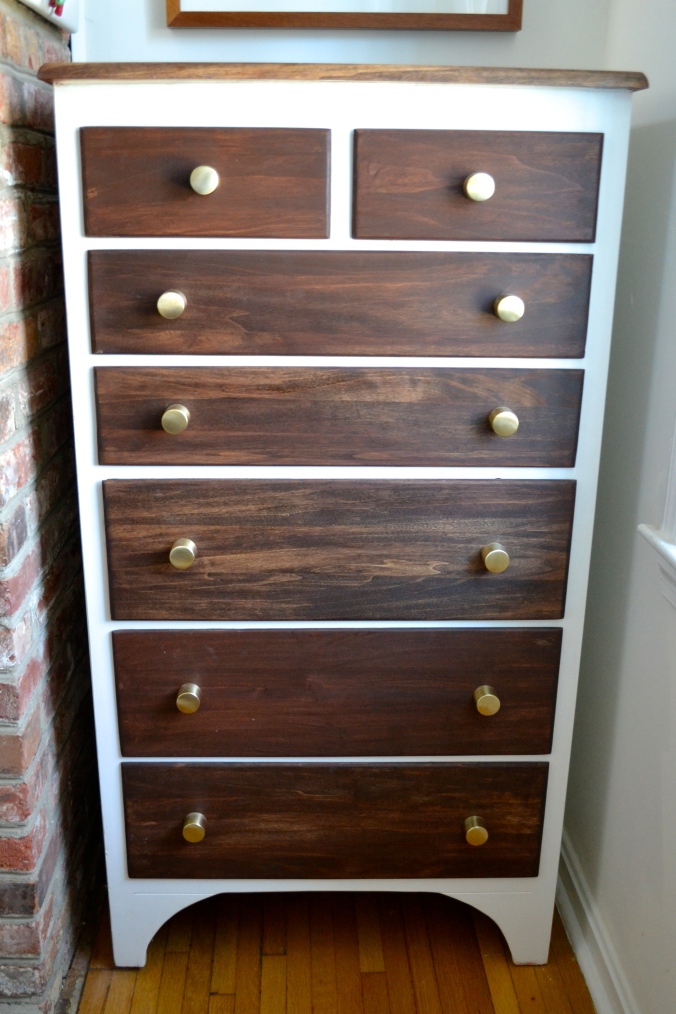
Dresser AfterNot bad, eh? Here is a side-by-side for your viewing pleasure.
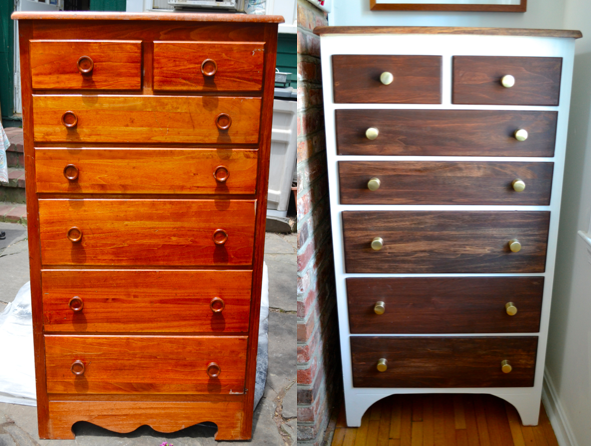
Screen Shot 2016-01-02 at 7.08.58 PM

I hope you like it! I will be sharing the other bedroom progress soon.

XO, Julia

Copper and Sisal IKEA Lamp Hack

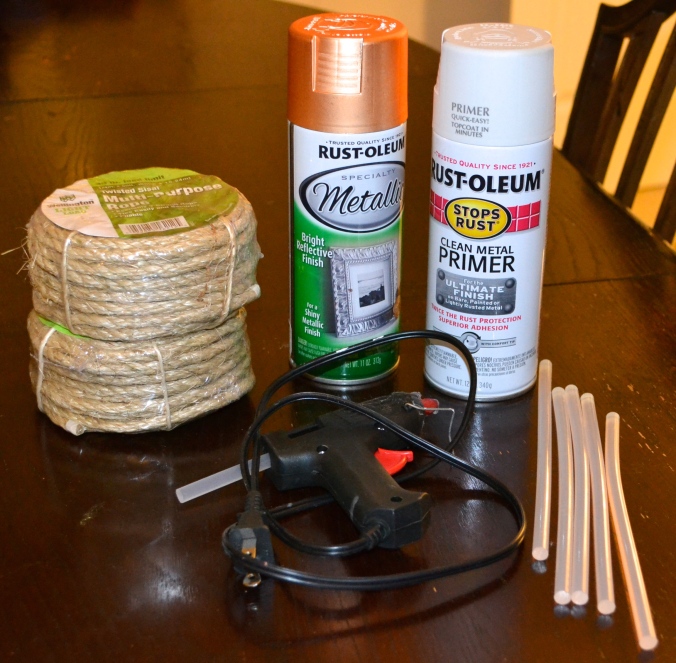
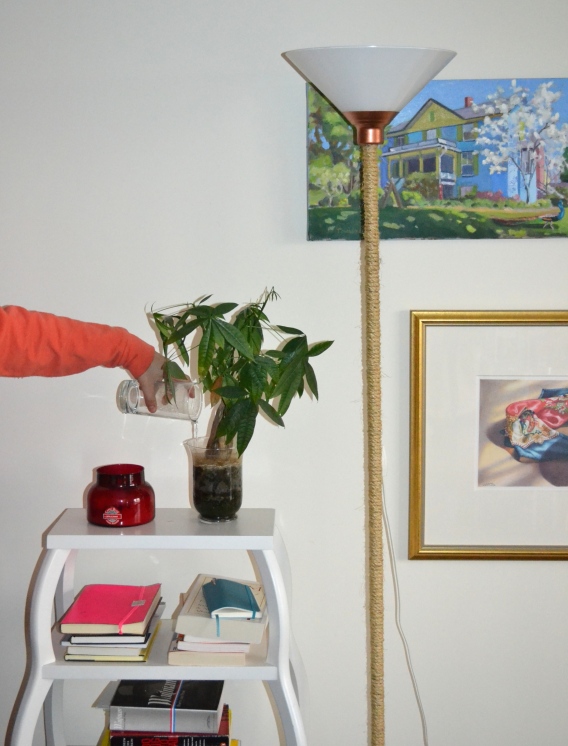
Hi! How many of you have a boring but fine floor lamp in your life? You know the one – a few sections twist together, shines up at the ceiling, you paid about $20 for it for a dorm room or your first apartment? I am pretty sure we all do. I have a way to really pump up the jam on it and make it something you actually WANT to keep in your life, as opposed to a useful barnacle, clinging to your living room like a passenger from your early 20s. (Insert sob – when did my early 20s become the past??) I made over this IKEA Kroby lamp for my friend Joanna’s yoga room/office with just a few supplies and only one episode of Downton (including drying time). This is another project from before I started the blog, but I SWEAR things are cooking along here, just nothing finished. Copper and Sisal IKEA Lamp Hack from Just Something I Whipped Up I had everything but the sisal rope on hand, and Joanna supplied the lamp, so it was a pretty quick and cheap project! Materials:

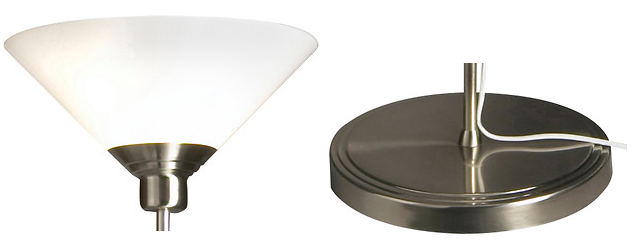
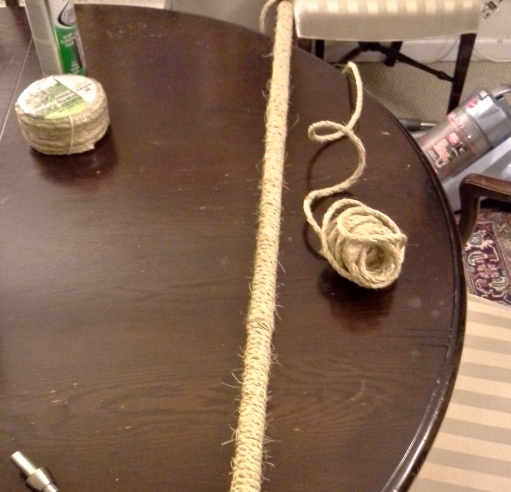
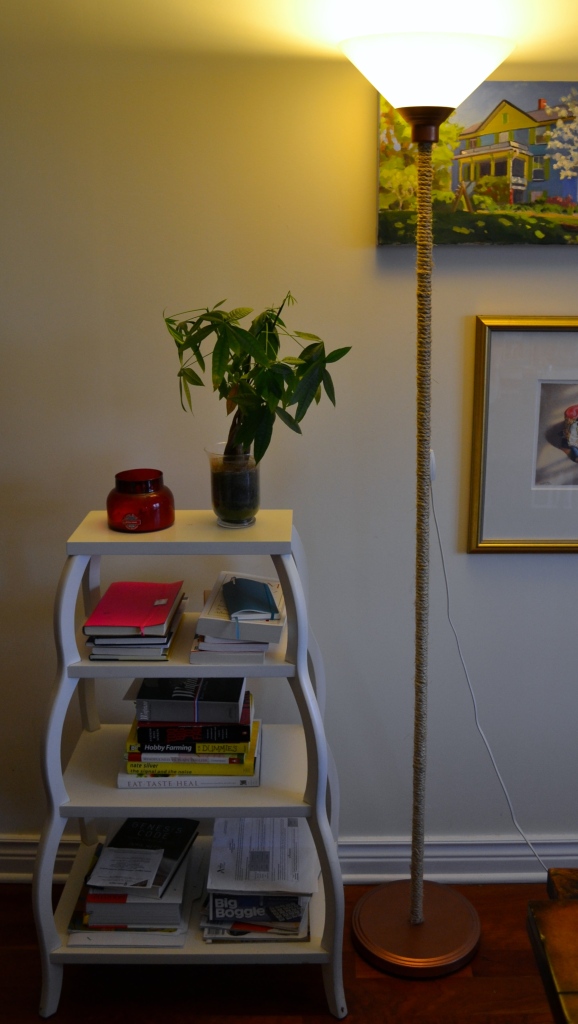
First, I removed the inner plastic ring, took the glass shade off and put both aside. I completely tape off the socket so that no paint could get in. Then I took off the base. I also took it apart to paint the metal cover and the fitting at the bottom of the stem, but in hindsight I think taping off the plastic bottom would be just fine. If you do take it apart, be careful to remember the order of the pieces. I didn’t and it was hard to get back together. These are the pieces to paint copper – I took the pictures from IKEA. Screen Shot 2015-02-03 at 2.45.59 PM I primed the cone that the lamp sits in and the base with two light coats of primer, letting dry between coats. I followed up with two lights coats of copper spray paint. The light coats prevent it from getting drippy. The cord made it really easy to hang the socket/cone part over the shower curtain rod to dry. Next comes the sisal part. The lamp post twists apart into three sections, with the cord coming out of a hole in the top third. The cord is attached to the socket, so it is easiest to wrap the bottom two sections before attaching the third. Just less cumbersome that way. Copper and Sisal IKEA Lamp Hack from Just Something I Whipped UpThe most important step here is to start by finding something interesting on tv. Wrapping the lamp post is easy and doesn’t take tooooo long, but it is boring. Once I landed on a Downton rerun, the steps were as follows – glue, wrap, twist; glue, wrap, twist; continue ad infinitum. Jk just feels that way. I tried to keep a little bit of tension on the sisal and made sure each wrap was right up against the last. Once I was almost at the end of the second section, I screwed on the top third and wrapped that as well, leaving room for the cord to come out. I wrapped it all the way to the top and cut of the rest. (I used it for my sisal wrapped mirror – $7.50 really well spent.) Copper and Sisal IKEA Lamp Hack from Just Something I Whipped UpOnce everything was dry, I screwed the whole thing back together and we were off!
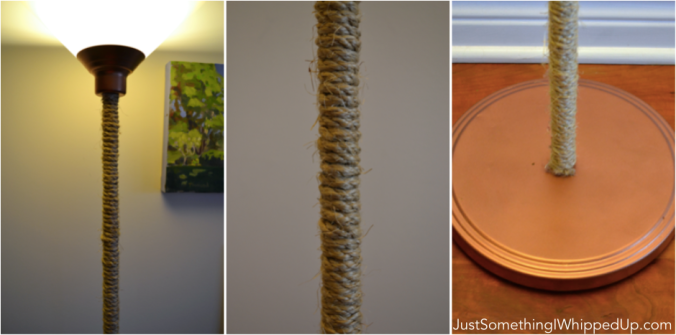
Copper and Sisal Ikea Floor Lamp Hack by Just Something I Whipped Up

Copper and Sisal IKEA Lamp Hack from Just Something I Whipped Up Copper and Sisal IKEA Lamp Hack from Just Something I Whipped UpI hope this inspires you to up your floor lamp game! XO, Julia

Copper and Sisal Ikea Lamp Hack

Kitchen Makeover!

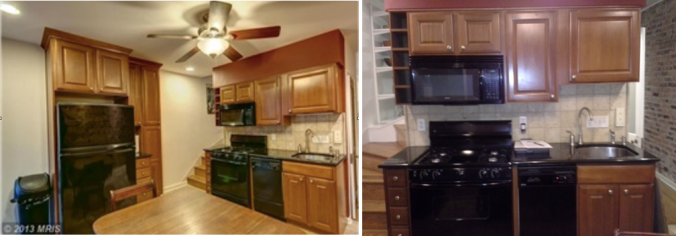
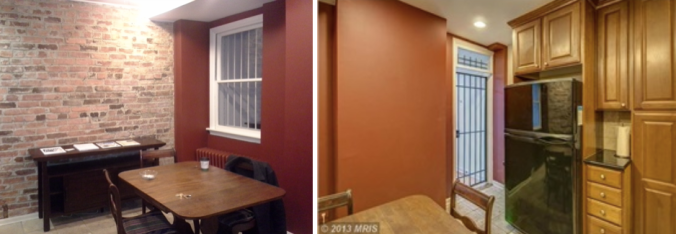
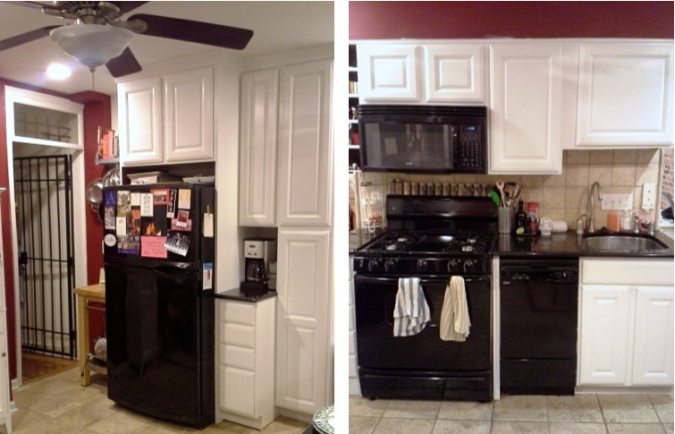
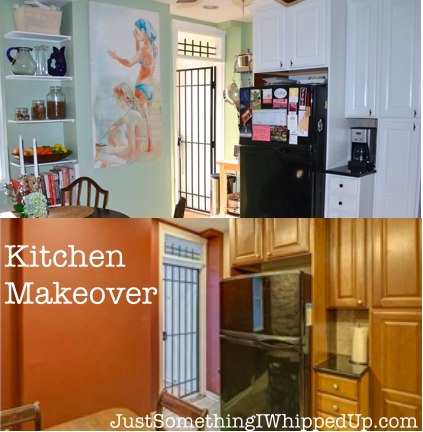
Hi! Sorry I have been MIA for a bit. Christmas got a little crazy and then the dreaded January slump happened. It’s too cold to do projects outside and plus, I was just not feeling particularly creative. BUT, now we have some bigger projects in the works around here. While those get underway, I thought I would share the before and after pictures of our kitchen, even if they are pretty old. It was the very first thing we started working on when we bought the house and it made a HUMONGOUS difference. Night and day. Here is where we started (not amazing photography, sorry…):
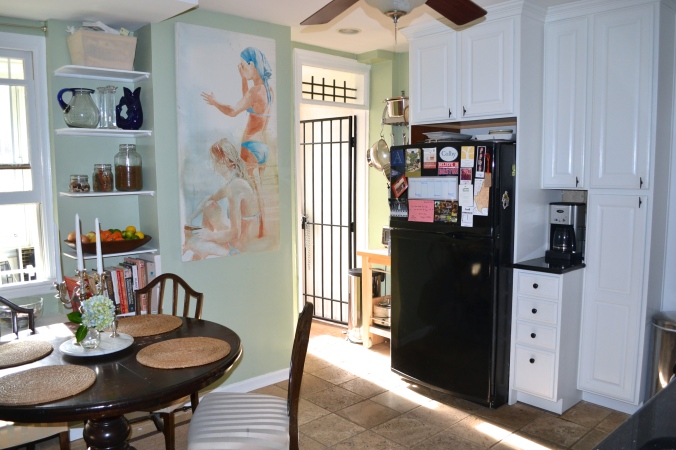
Kitchen Makeover from Just Something I Whipped UpKitchen Makeover from Just Something I Whipped UpDark red, dark wood, black countertops… All in a room that gets roughly one hour of direct sunlight a day. The furniture is the previous owner’s.

Before we even moved our stuff in, we started painting the cabinets. In fact, we started sanding them the night we signed the papers. After I almost burned our brand-new-to-us house down. We’d only had it 4 hours. Pro tip: ALWAYS wait for the first fake log to burn out before adding a second. Anyway, I am not going to go through a full cabinet painting tutorial here because there are some great ones out there and frankly, it was super boring. Super. Boring.

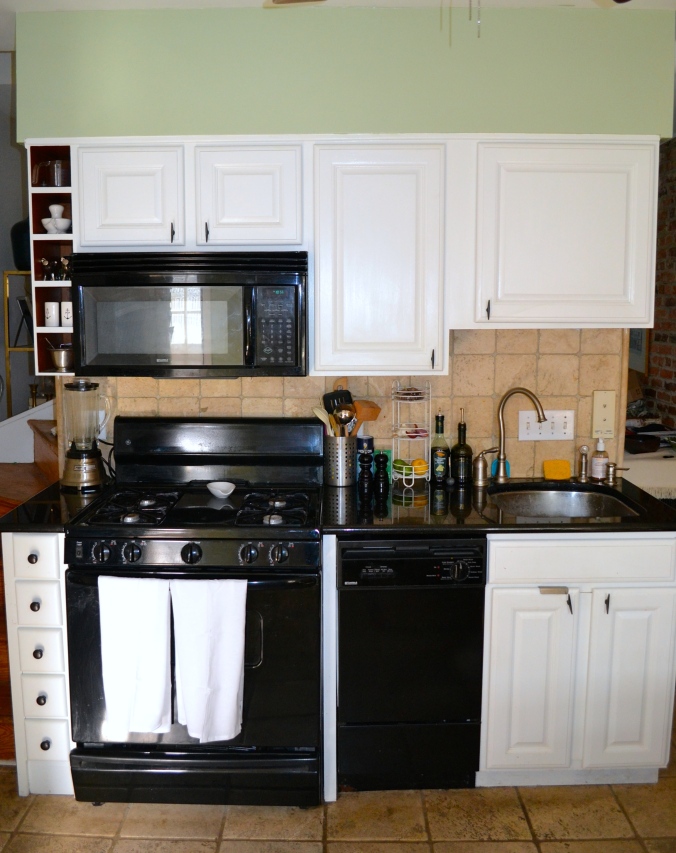
So after days of sanding, priming, painting and a blessing in the form of Sam’s parents showing up and his dad finishing most of my part of the paint on the cabinets, we were in a much better place.
Kitchen Makeover from Just Something I Whipped Up

I added these pretty Anthro streamline pulls for the cabinets and sprayed the old knobs with Rustoleum’s oil rubbed bronze spray paint for the drawers. There are nine weirdly tiny drawers, so that saved a good chunk of the hardware budget to use elsewhere.

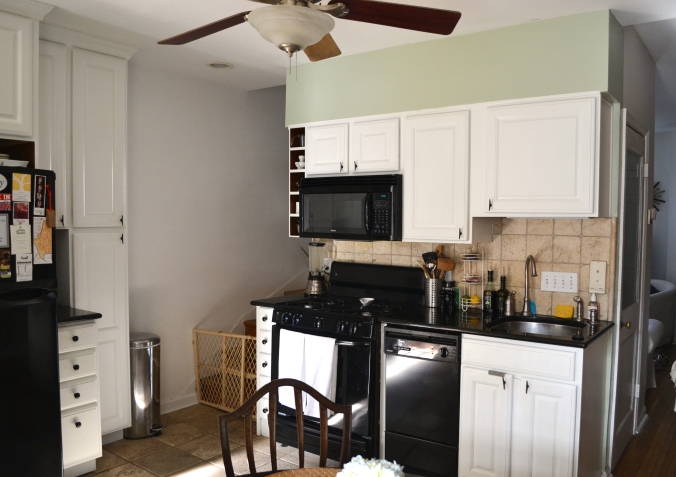
The next big upgrades came when my family came to visit and we painted the walls Benjamin Moore’s Spring Valley.  Why yes, it did take my mom, dad and I the entire day to pick a color. Thank heavens Sam liked it. I think he also liked that he wasn’t around for a day of paint swatching.

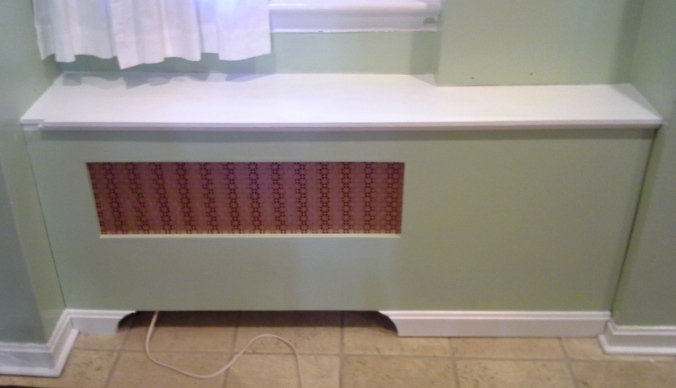
While my fam was visiting, my dad and Sam built a radiator cover to conceal the wonky radiator, which made a huge difference.

Kitchen Makeover from Just Something I Whipped Up

I painted it and added the screen… gotta love that copper spray paint. The front panel pulls out so we can access the radiator, but the shelf is fixed.

Finally, Sam’s dad and uncle helped (ok mostly did it for us) build shelves in the corner above the radiator.

After a lot of work and paint we have a completely different and MUCH brighter kitchen.

Kitchen Makeover from Just Something I Whipped Up

Kitchen Makeover from Just Something I Whipped Up

Kitchen Makeover from Just Something I Whipped Up

Kitchen Makeover from Just Something I Whipped Up

Kitchen Makeover from Just Something I Whipped UpSo there you have it. This is our “stage one” kitchen makeover. We are now getting the ball rolling on an actual kitchen renovation, and I will share those details at some point soon. All I have to say is, how much better would it be if the windows WENT TO THE OUTSIDE instead of the laundry room?

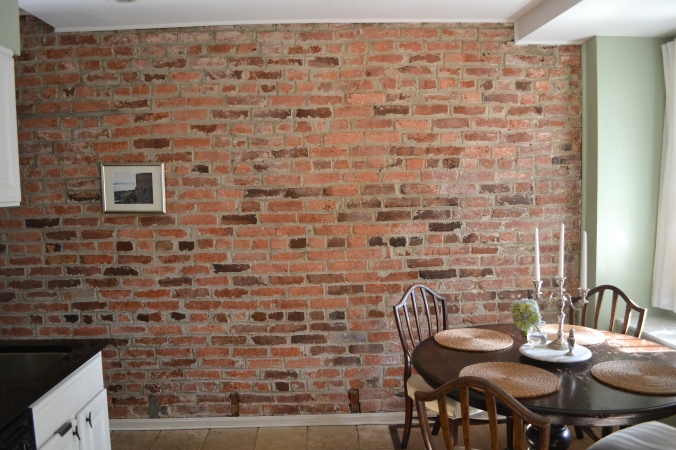
Also, it is painfully clear to me now that the brick wall needs art. That photo landed there on a preexisting nail the day we moved in, and there it still hangs.

I hope you enjoyed the change!

XO,

Julia

P.S. – To friends/brother-in-law whose 2015 weddings we have been invited to, please be assured the save the dates usually occupy a place of honor on the fridge, but I didn’t think the 9 people who might see this ALL needed to know the deets.


Quick Gift: Gold Oyster Dish

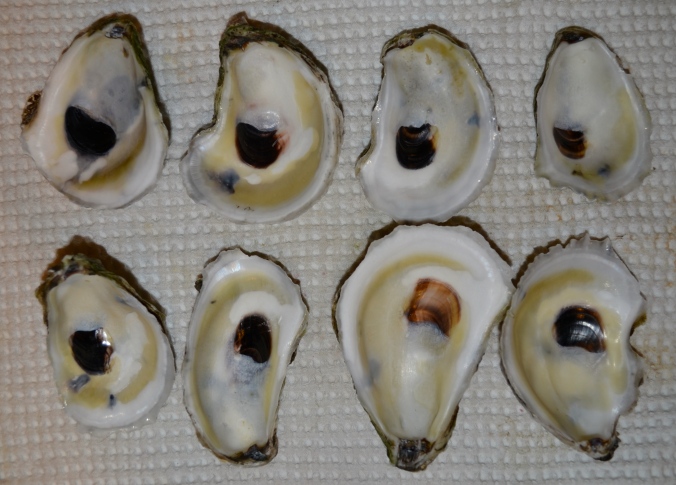
Hi! I hope everyone had a fab Thanksgiving and is enjoying the start of the holidays. We had a great Christmas party here, and while cleaning up I finally remembered to save oyster shells for a project I have been meaning to do forever – gold painted trinket dishes! I am by no means the first person to do this, but I thought I would share anyway.

Gold Oyster Dish from JustSomethingIWhippedUp.com

They are insanely easy. However, if I give you one for Christmas, ignore that part and pretend I worked super hard on it…

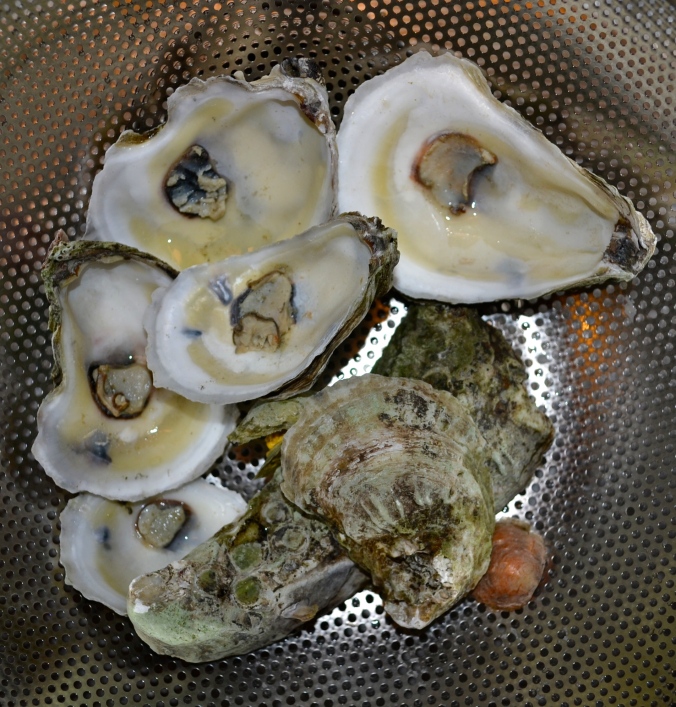
First, I boiled the oyster shells for about 20 minutes (truth, I got distracted and forgot they were boiling, so 20 minutes is really a random number). This killed anything left living on them, like surprise other mollusks – like the pink guy in the picture below – and algae. It also cooks what is left of the oyster so that it a. comes off easy and b. you don’t barf from the smell of old oysters while cleaning them.

Gold Oyster Dishes from JustSomethingIWhippedUp.com

Once boiled and cooled, I scraped off the left over oyster gunk (the scientific name) and scrubbed them inside and out with steel wool.

Gold Oyster Dishes from JustSomethingIWhippedUp.com

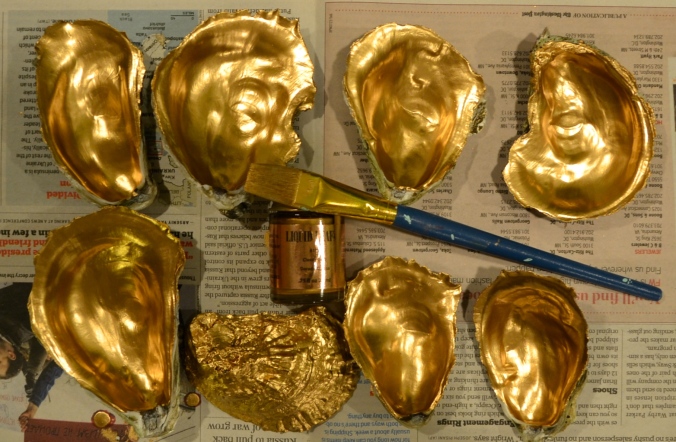
Finally, I gave the insides (and one outside) two coats of Liquid Leaf. Love that stuff. I was going to use silver too, buuuuut I couldn’t open it. Yes, I did try running hot water over it. And a wrench. Nada.

Gold Oyster Dishes from JustSomethingIWhippedUp.com

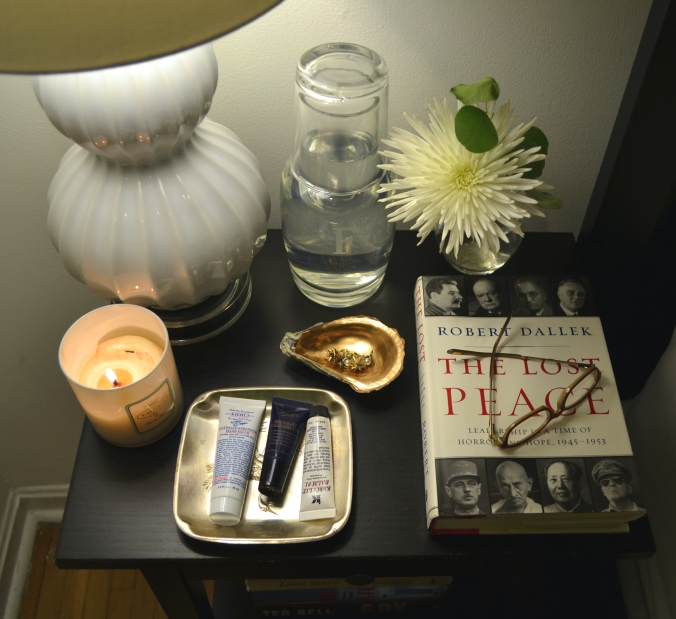
Honestly, I spent WAY more time tricking you into thinking my bedside table always looks nice and taking pictures than I did making these.

Gold Oyster Dishes from JustSomethingIWhippedUp.com

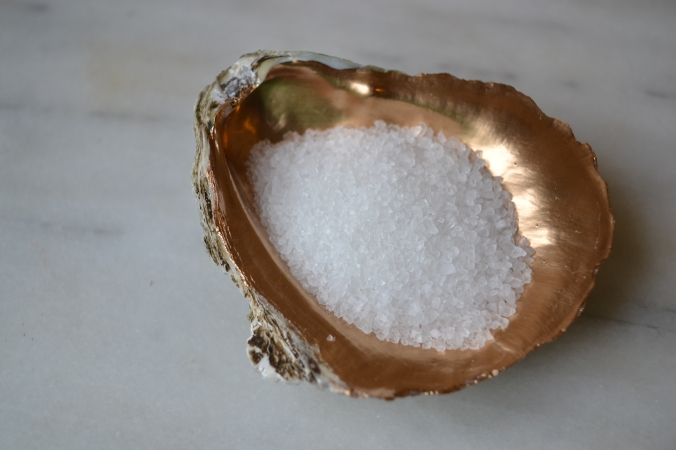
In addition to holding jewelry, you could use them as little salt cellars on the table, though you may want to use a food-safe sealant first.

Gold Oyster Dishes from JustSomethingIWhippedUp.com

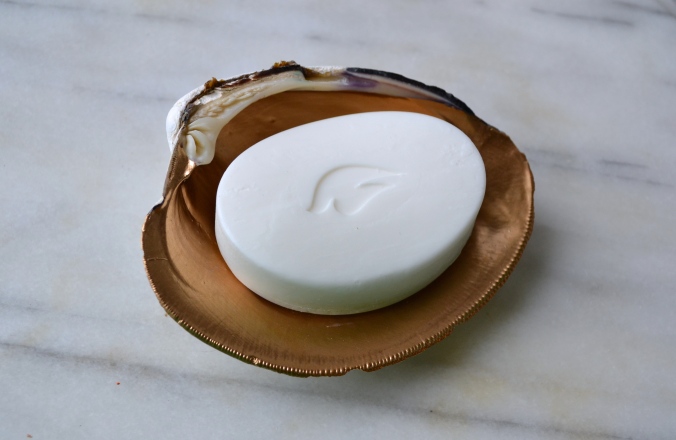
Or as a soap dish – smaller guest soaps work best. I tried it with a regular bar of Dove and it looked a little ridiculous. This is a travel sized bar. And yes, I also painted a clamshell and am pulling a fast one on you. Gold Oyster Dish from JustSomethingIWhippedUp.com

So there you have it. Have some friends over, eat oysters, drink champagne and then spend 25 minutes making them all Christmas presents. Boom. You are welcome.

XO,

Julia

Himmeli Candleholders

Hi! I wanted to share these fairly simple Himmeli candleholders that I made last week that might be just the thing for your Thanksgiving table. What is Himmeli, you ask? It was originally a type of little Finnish Christmas ornament, but lately it has been adapted into all kinds of cool DIYs. I had some mini fishbowls (is that what these are? Some seriously mini fish…) so I decided to spruce them up a bit with a cool “copper” Himmeli pattern.

Himmeli Candleholder from JustSomethingIWhippedUp.com

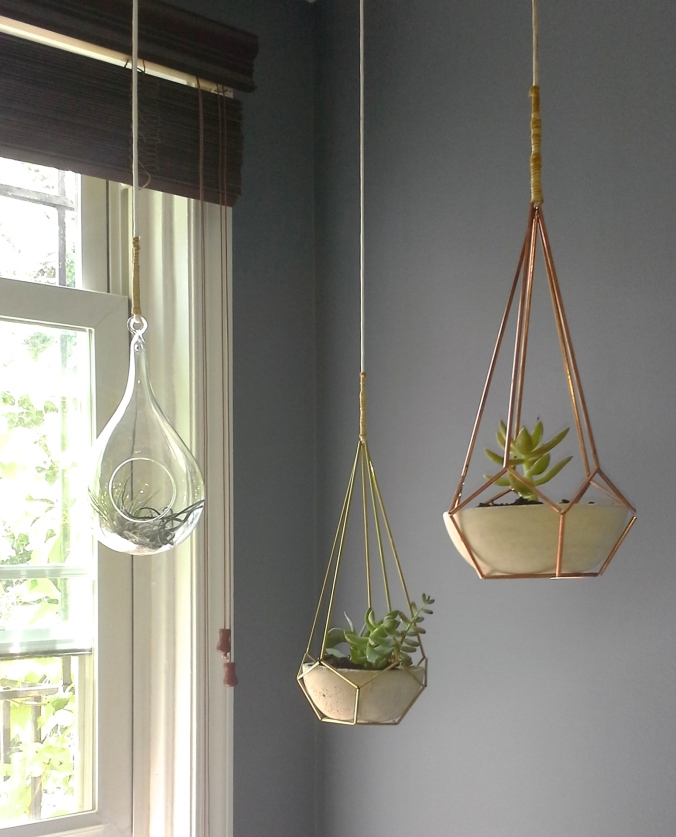
Earlier this year I made a few Himmeli plant hangers using Mandi from Vintage Revivals tutorial and they turned out looking sooo good.

Himmeli Candleholder from JustSomethingIWhippedUp.com

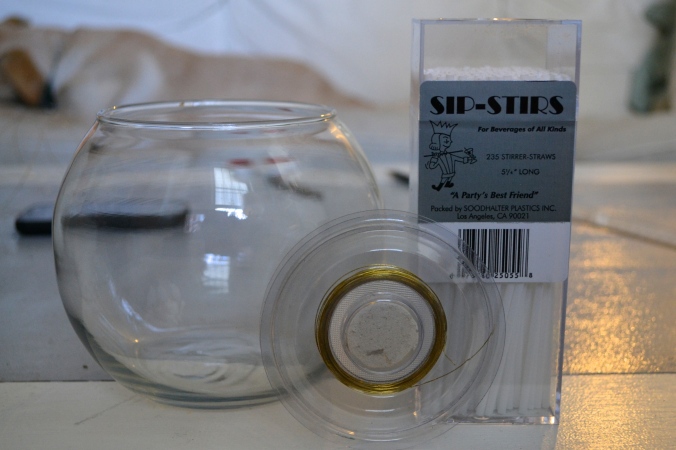
For the hangers I used brass and copper tubing that I cut down to size, but for this project I took a pretty serious shortcut and used cocktail straws.

Himmeli Candleholder from JustSomethingIWhippedUp.com

Materials:

  • Thin wire – you can use string/yarn but I found it was annoyingly difficult to string the straws on the yarn. Plus the wire added a bit of structure
  • Cocktail straws
  • Mini fish bowl – I think this 6″ glass bubble bowl is what I used
  • Copper spray paint

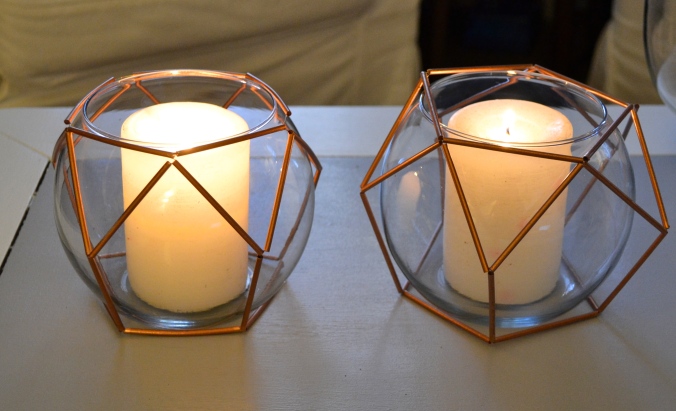
First I cut 25  2 5/8″  lengths of cocktail straw. (I went on to make a second candleholder with 2 3/4″ pieces. You can see what a difference it make in the picture above. I think the absolute best would be something between the two, but I was having trouble getting precise enough lengths.)

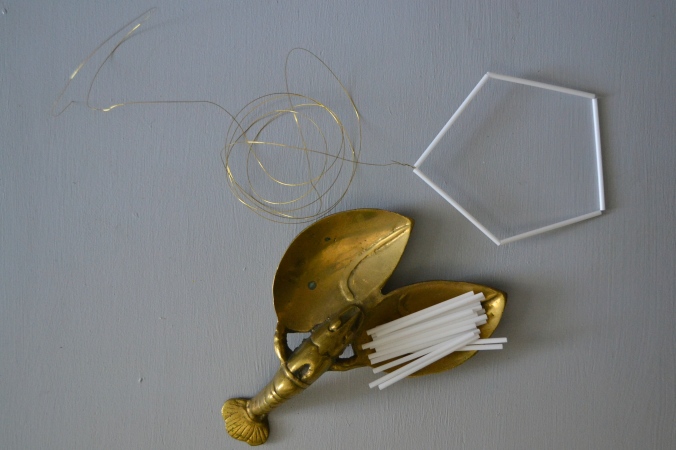
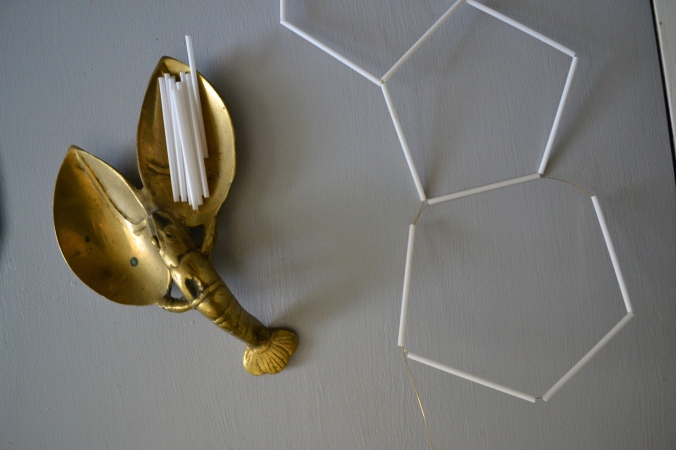
I then cut two “wingspans” worth of wire – about 9 feet. To start the Himmeli design, I took 5 pieces of straw and wired them together to form a pentagon at one end of the wire. Himmeli Candleholder from JustSomethingIWhippedUp.com

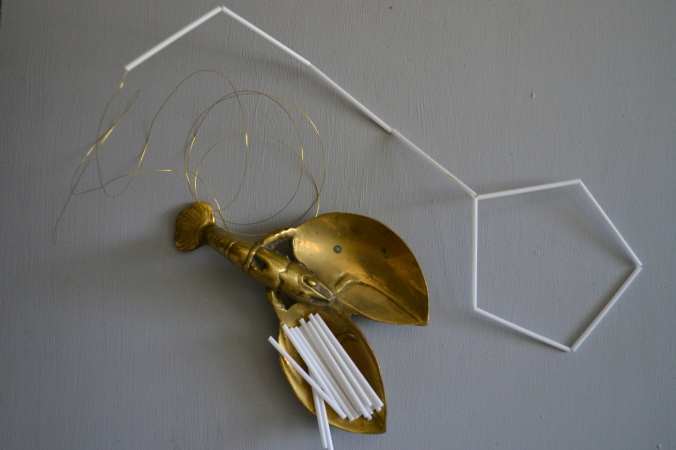
Thanks for your help, Mr. Brass Lobster. My other loyal sidekick, Charlie, was doing a SUPER good job of eating pieces of cocktail straw.

Next, I threaded 4 more pieces onto the wire.

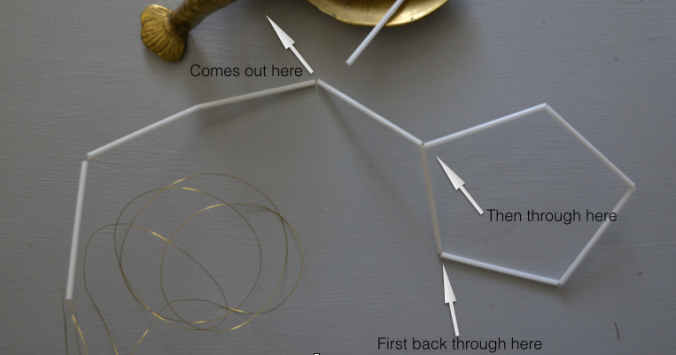
Himmeli Candleholder from JustSomethingIWhippedUp.comTo make another pentagon, I threaded the wire back through the closest side of the adjacent pentagon and the connecting side of the new pentagon. That sentence s basically useless; here is a picture.

Himmeli Candleholder from JustSomethingIWhippedUp.com

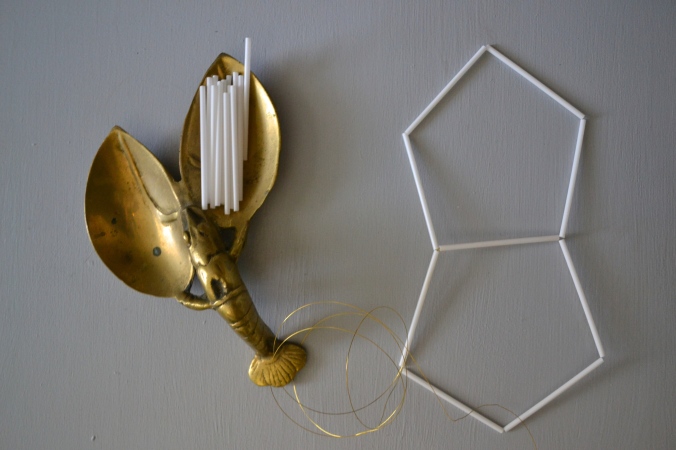
Which gave me this

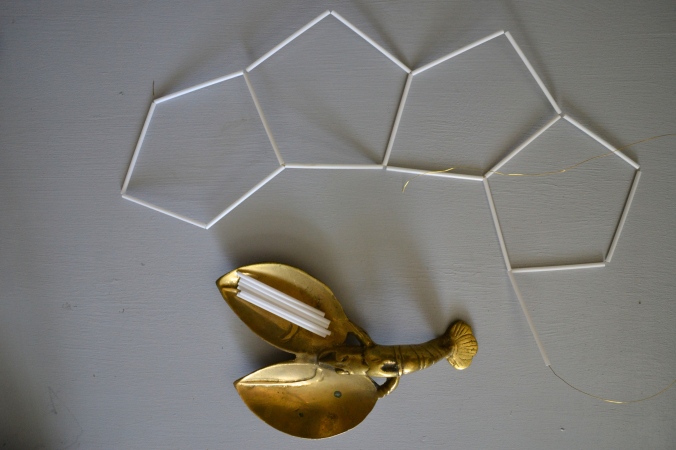
Himmeli Candleholder from JustSomethingIWhippedUp.comI repeated that step to get another pentagon.
Himmeli Candleholder from JustSomethingIWhippedUp.comAaaaand one more. Once I had a row of four pentagons, I added one additional piece of cocktail straw. This became the magical fifth pentagon.

Himmeli Candleholder from JustSomethingIWhippedUp.com

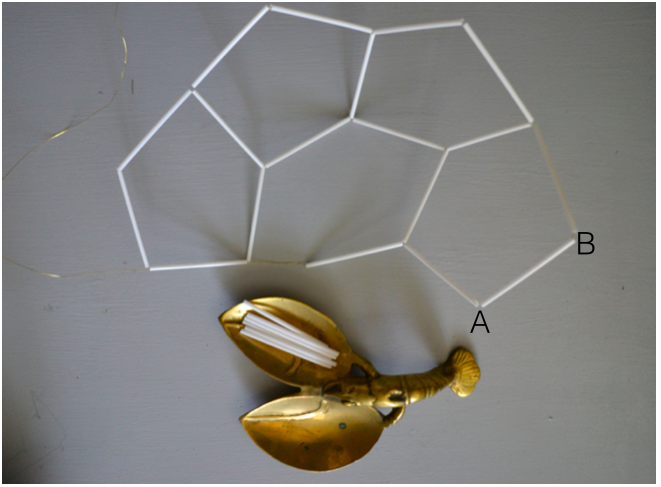
I pulled the wire back through the far side of the first pentagon I made, like so:

Himmeli Candleholder from JustSomethingIWhippedUp.com

And then I added two more straws and threaded the wire in at point A and out at point B which gave me this. I SWEAR this sounds way more complicated than it is.

Himmeli Candleholder from JustSomethingIWhippedUp.com

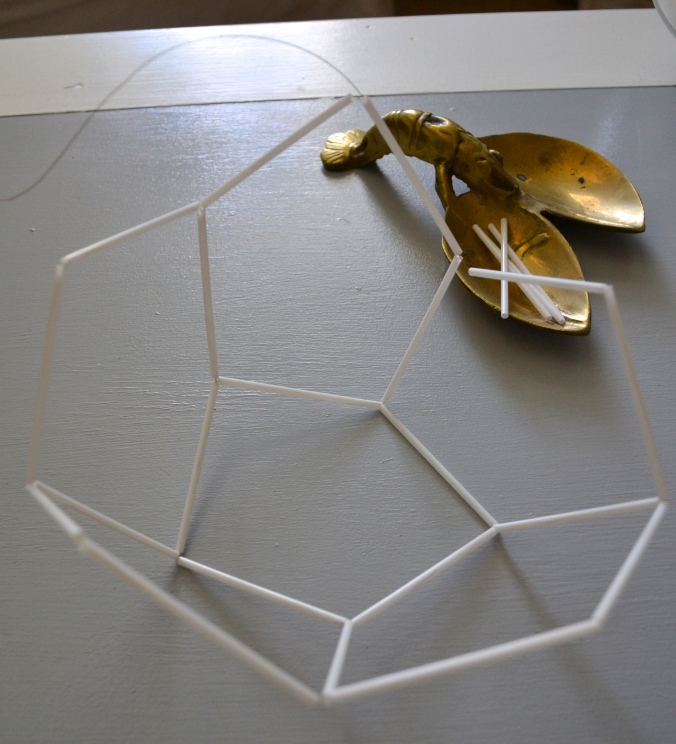
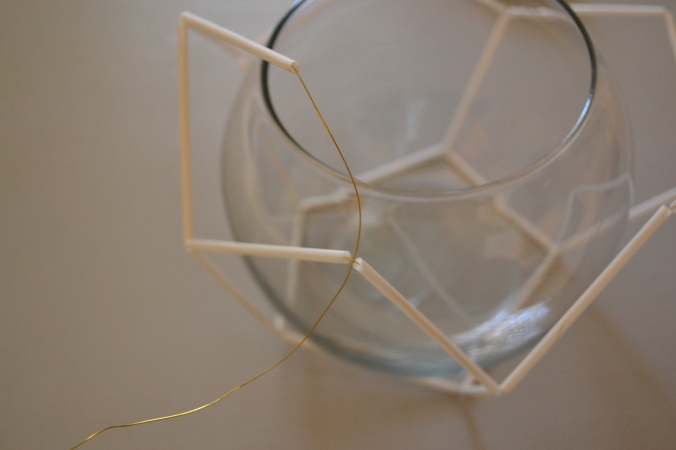
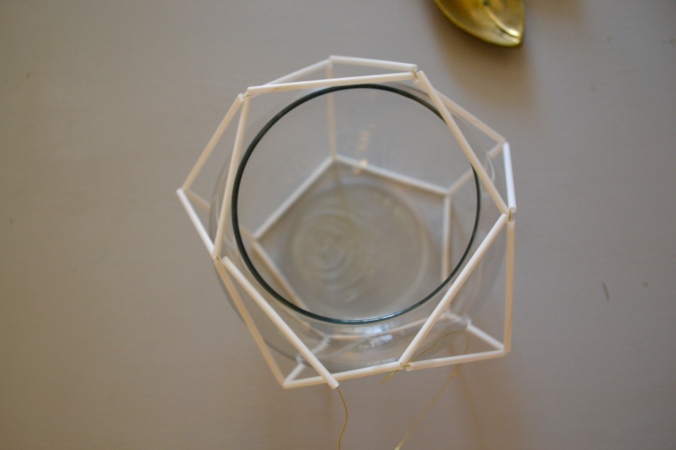
At this point I put the fishbowl into the basket I made to make sure it would fit. Phew, it did. I added a piece of straw to the wire and started connecting the points, just looping the wire forming the point as I went. Himmeli Candleholder from JustSomethingIWhippedUp.com


This is what I had once all of the points were connected. Himmeli Candleholder from JustSomethingIWhippedUp.com

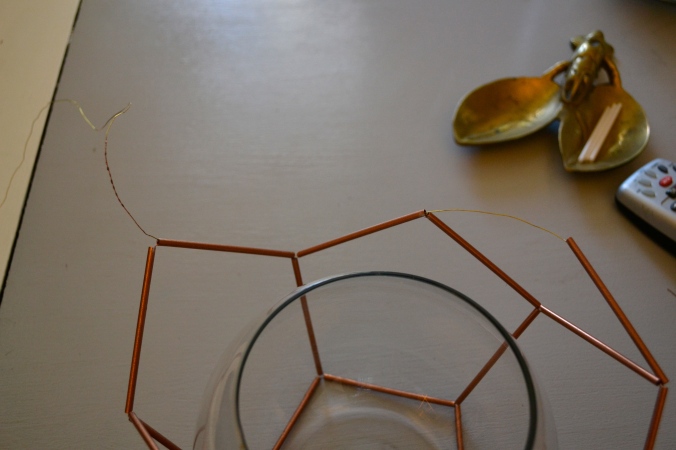
I did not tie it off here though. Instead I slightly loosened the whole thing, took the bowl out and spray painted the straws copper. It sounded easier than spraying the straws in advance. Once it was dry, I put the bowl back in and tied off the last point.

OK, I am also going to tell you what I did on the second bowl because it is slightly neater, but a little more complicated and if I had pictures this post would be about a million years long. On the second bowl, I connected the first two points, then went through the next two straws before coming out at the next point over and connecting that to the next one. Like this:

Himmeli Candleholder from JustSomethingIWhippedUp.comOnce every other pair of points was connected, I went straight around the rim with the wire and filled in the gaps. And here they are!

Himmeli Candleholder from JustSomethingIWhippedUp.com

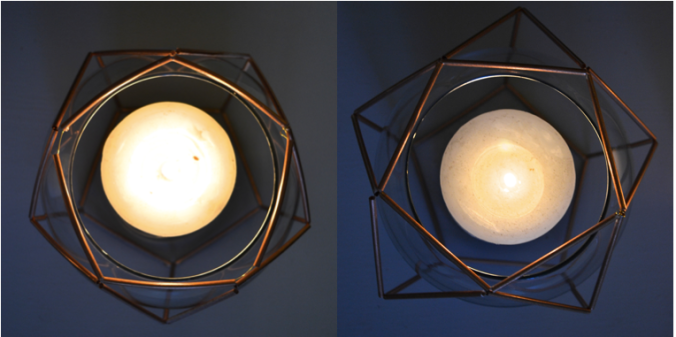
Himmeli Candleholder from JustSomethingIWhippedUp.comPop a candle in and watch the cool shadows!

Happy Thanksgiving

XO,

Julia

Himmeli Candleholder from JustSomethingIWhippedUp.com